Effect Controls in Premiere Pro
 Jordy Vandeput
59K views
Learn how to use the Effect Controls panel in Adobe Premiere Pro to adjust video and audio properties in this beginner tutorial.
How do the effect controls work?
Well first of all, if you don't see your effect controls panel in Premiere Pro, head over to the workspace tab in the menu and select effect controls.
The first thing you will notice in the panel is a lot of numbers, but how do they work? We'll start with the motion controls. Here you can start with the position properties of your video. The first value is your X axis and the second one is your Y axis or in English, your horizontal and your vertical positioning. You can either drag those values to change them or just click on them and type whatever you want.
Next is the scale property, this makes your video bigger or smaller, when you uncheck uniform scale you can change the width and height separately but this gives a weird and distorted look. Rotation is next. Basically you can rotate you video clockwise and counterclockwise.
Anchor point, this is a tricky one. At first glance it looks like the position of your clip but it isn't. In fact, you can manually adjust this to another position on your clip and this will affect the rotation and scaling properties. If you rotate it will rotate around your anchor point, same applies for your scale.
The Anti-flicker filter is the last property of the Motion controls, this decreases the flickering in your shot but I honestly think it doesn't work that well.
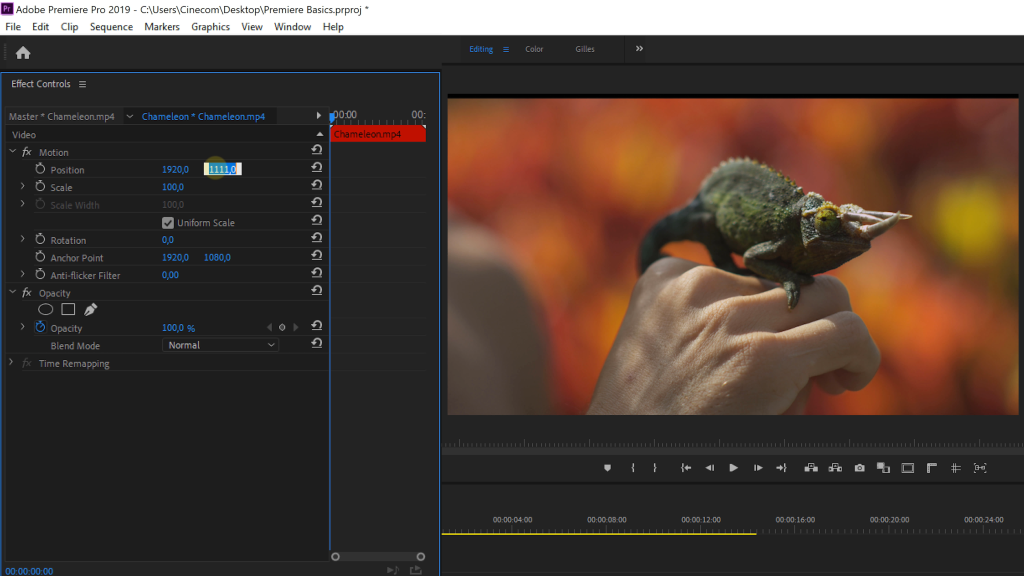
Next is the Opacity control, you can change the transparency of a clip, if you stack clips above each other this will create some cool blending effects. You can also adjust the blending modes of the opacity but we'll explain more about that in the in-depth blendmode tutorial which you can find here.
Lastly is the Time Remapping property, this can be used to speed remap your footage, but also this we will explain in an in-depth video. You can find more about that via this link.
But can I control my audio settings in Premiere Pro?
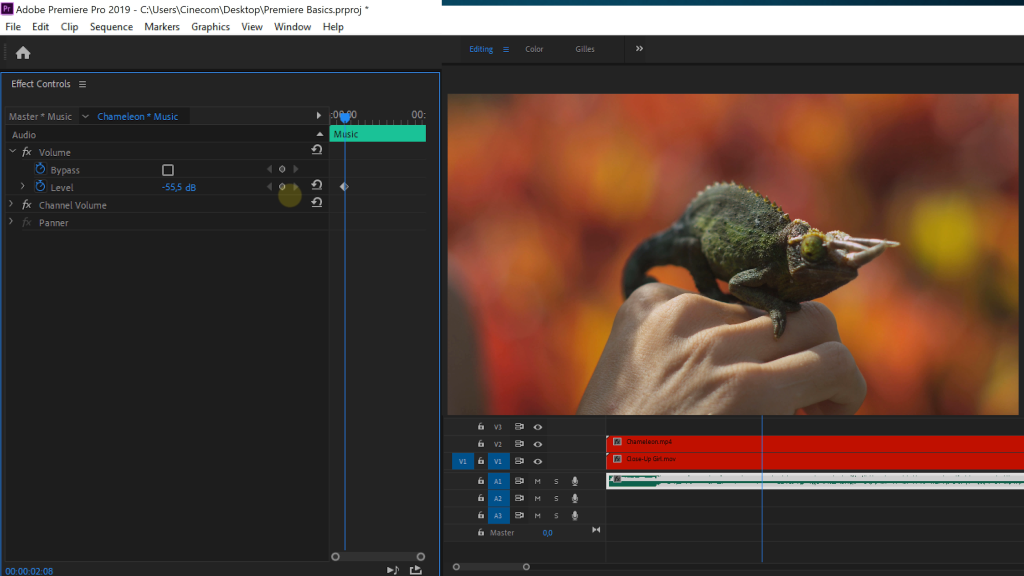
Of course you can! Beneath the video controls you can find the audio controls if your audio is linked to you video. If it isn't, click on you audio file. You can now adjust the volume and pan the audio from left to right.
Can I learn even more?
Hell yeah, we don't only post tutorials on YouTube, we also have complete online courses on Skillshare. The first two months are for free so why not check it out right now?!
Jordy Vandeput
Founder of Cinecom · 2.75M+ subscribers on YouTube
Jordy Vandeput is a Belgian filmmaker who has taught practical filmmaking to millions through Cinecom. He breaks professional techniques down into clear, repeatable steps you can use on your very next project.


0 comments