Lumetri Color Panel Removed: 5 Premiere Pro Grading Tricks
 Jordy Vandeput
Is the Lumetri Color panel removed in Premiere 27.0? The panel retires, but the effect stays. Here are five grading tricks to learn now: two ways to make one color pop, a film look with FilmConvert Nitrate, a skin tone fix with HSL Secondary and a dreamy glow.
Is the Lumetri Color panel removed from Premiere Pro? Almost. Adobe is retiring the panel starting with Premiere 27.0, but the Lumetri Color effect stays and its controls move to the Properties panel. So here are five grading tricks worth learning now: two color pops, a film look, a skin tone fix and a dreamy glow.
Is the Lumetri Color panel removed for good?
Only the panel goes. Adobe's page on what's new in Premiere 27.0 says you'll still apply Lumetri Color from the Effects panel like any other video effect, then edit it in Properties. Old projects keep their Lumetri settings.
Read two more things before you update. Adobe removed Clip Match, and it advises against mixing Lumetri Color with the new Color mode (the color page I mention in the video), because Lumetri can clip color values you can't get back later. When I wrote this, Adobe still labeled Color mode as beta and listed 27.0 as upcoming, and its advice for unfinished projects is to stay on 26.x until they're done.
Everything below was filmed in the current Lumetri panel. In 27.0 you'll reach these controls through Properties, so the layout may look different.
How to make one color pop with Lumetri curves
Look at the red car in the video above. I want it to almost jump out of the frame, and there are two ways to get there. This first route needs one clip.
Boost the color with Hue vs Sat
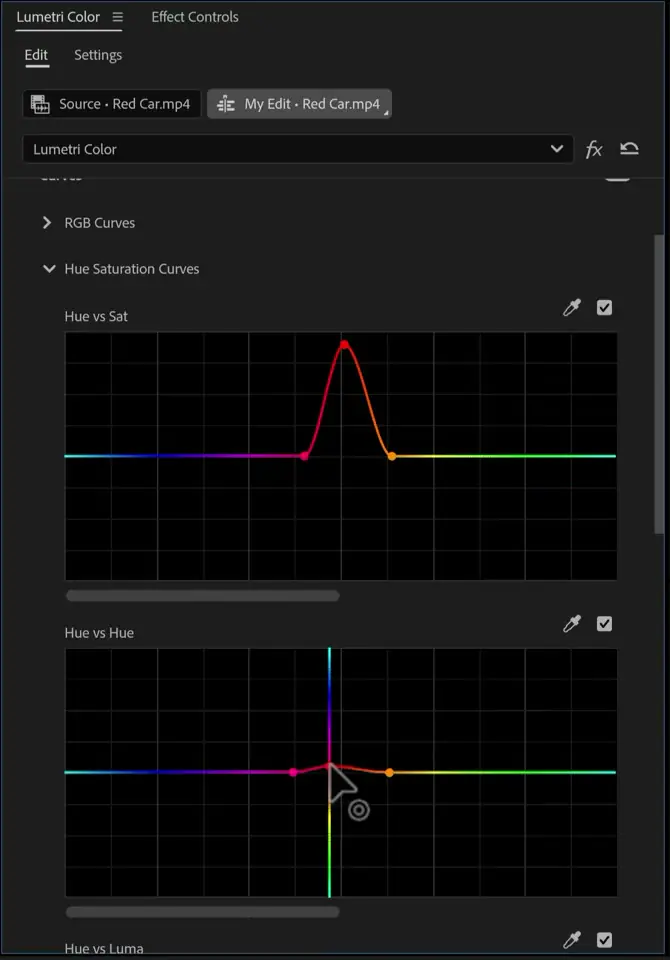
Open the Curves tab in Lumetri and find the Hue vs Sat curve. Click the color picker, then click the car in the Program monitor. Three points appear on the curve. Drag the middle one up and only that color gets more saturated.
The car still looked too orange. Hue vs Hue fixes that, because it shifts a selected color toward another hue. Pick the reds, nudge the middle point up and the paint looks deeper.
Remove the background color with a second Lumetri effect
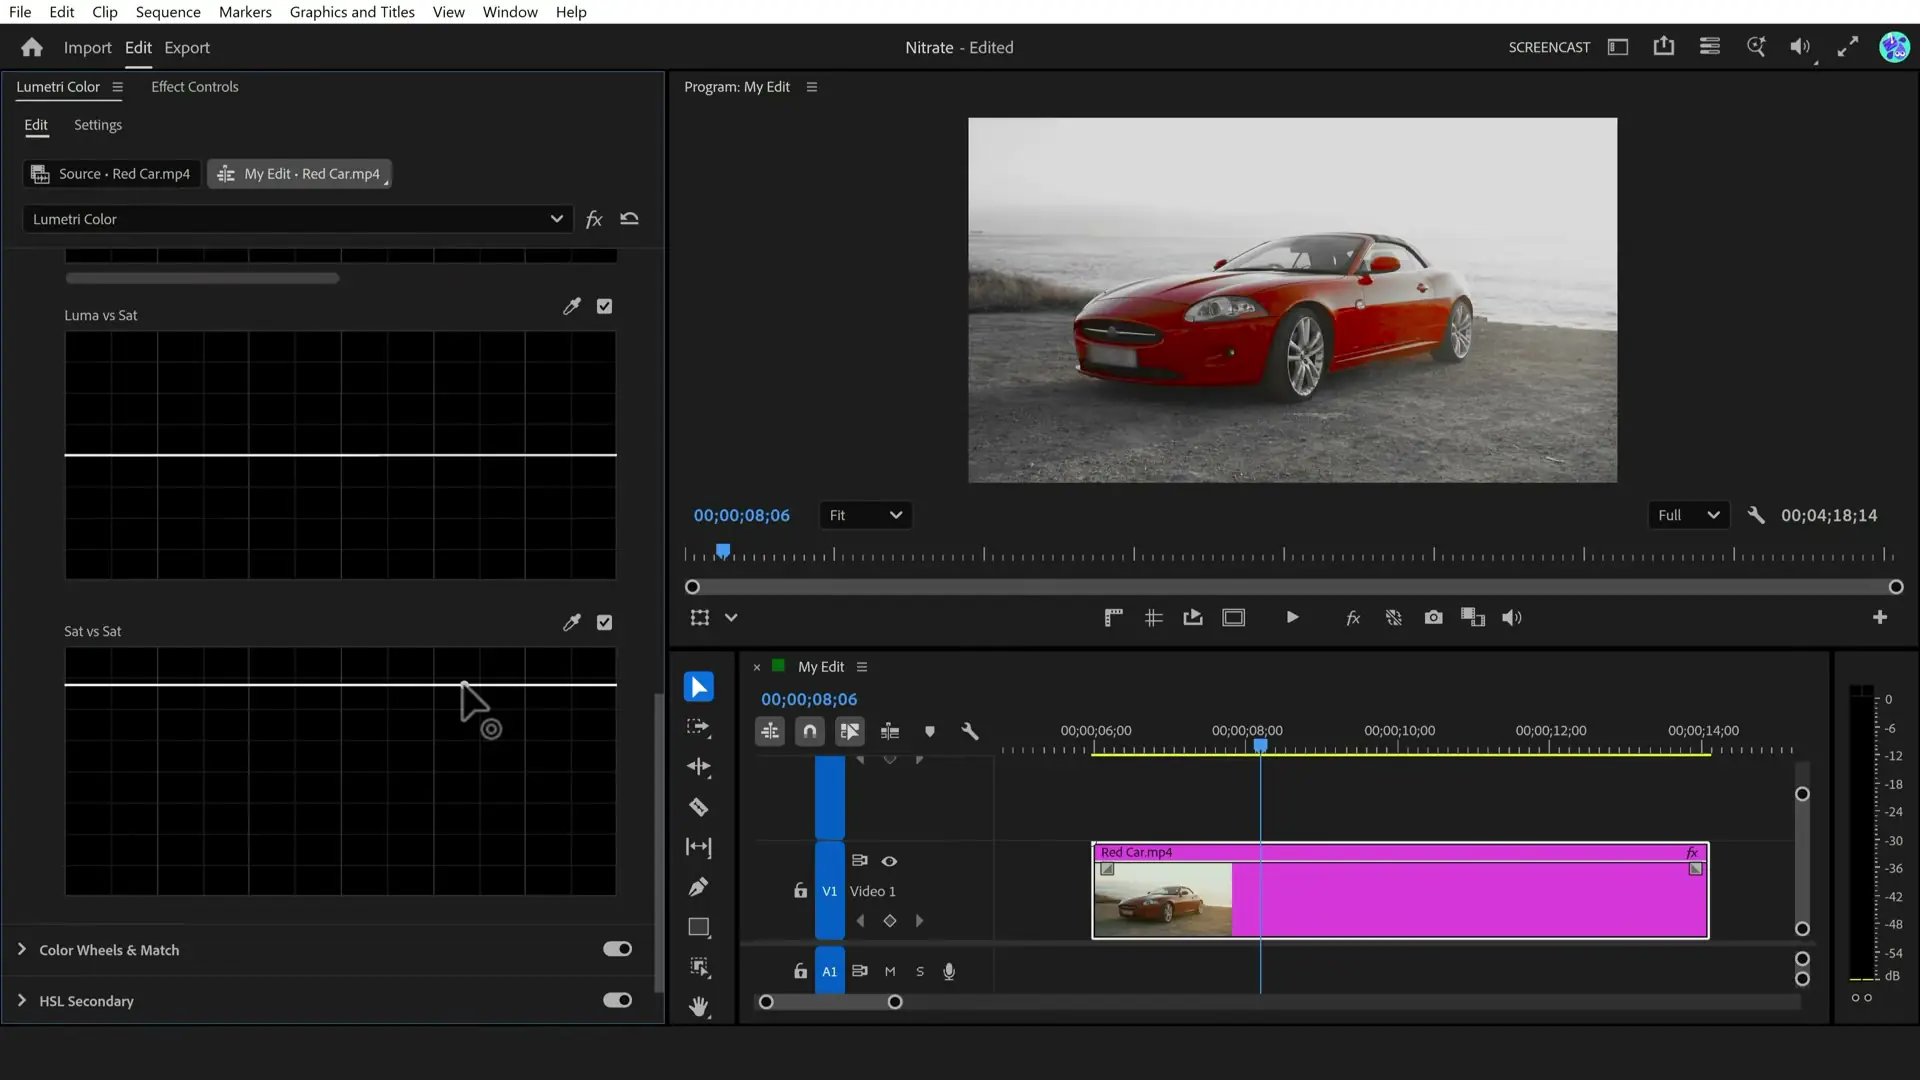
Now the background. Open the Lumetri Color dropdown at the top of the panel and click Add Lumetri Color Effect, which stacks a fresh instance on the same clip. In its Hue vs Sat curve, select the reds again and pull everything else down until the whole frame turns gray and only the car keeps its color.
Fine-tune the selection. Then scroll down to the Sat vs Sat curve and raise it, and the red gets even stronger. If you'd rather swap a color than isolate it, I show that in how to change any color in Premiere Pro.
Isolate a color with the Object Mask tool
Curves select by hue. This second route selects the car itself and lays it over a black and white copy of the same clip.
- Select the clip and drag Saturation to 0 in Basic Correction.
- Hold Alt and drag the clip one track up to duplicate it.
- On the top copy, click Reset in Lumetri to bring the color back.
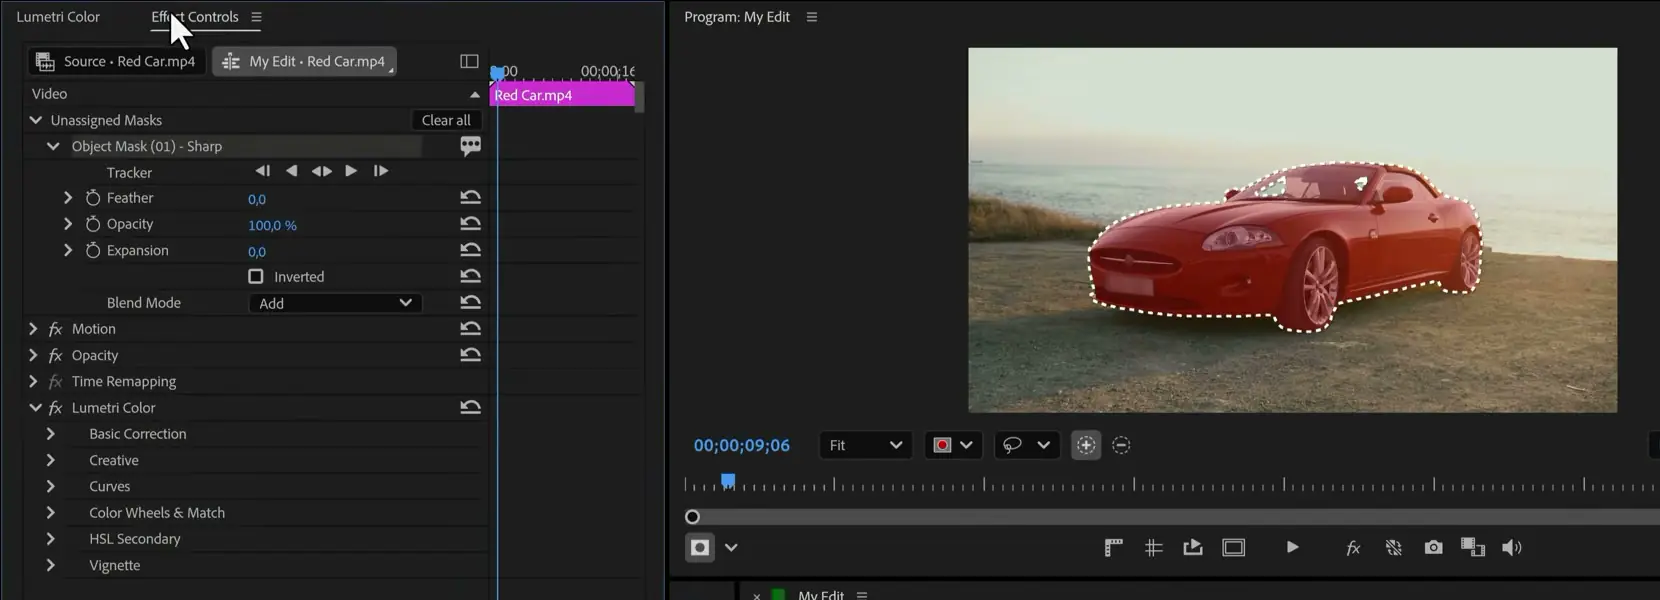
- Pick the Object Mask tool in the toolbar, hover over the car in the Program monitor and left-click once the AI recognizes it.
- In Effect Controls, find the mask and click the button that tracks forward and backward.
- When tracking is done, drag the mask onto the Opacity effect.
Now finish it in Lumetri. Hue vs Hue pushes the red a little deeper, and Hue vs Sat adds the saturation. The tool also came up in my look at Premiere Pro V25.6 and its Object Mask tool.
Get a cinematic film look with FilmConvert Nitrate
FilmConvert sponsored this video, so you know where this one comes from. For a film look I use FilmConvert Nitrate, which shows up in the Effects browser after installing, so you can drag it straight onto your clip like any other effect.
In Effect Controls, click Choose your camera and set the make, model and profile. Here that's a Panasonic GH6 in V-Log. Exposure, Temperature and Tint sit right below that, and the Film Stock menu comes next.
That menu is the fun part. Once you pick a stock, Nitrate adapts it to your camera's color science, and it applies real film grain instead of a simple overlay. The plugin is a one-time payment with no subscription, and the code PremiereBasics takes 10% off.
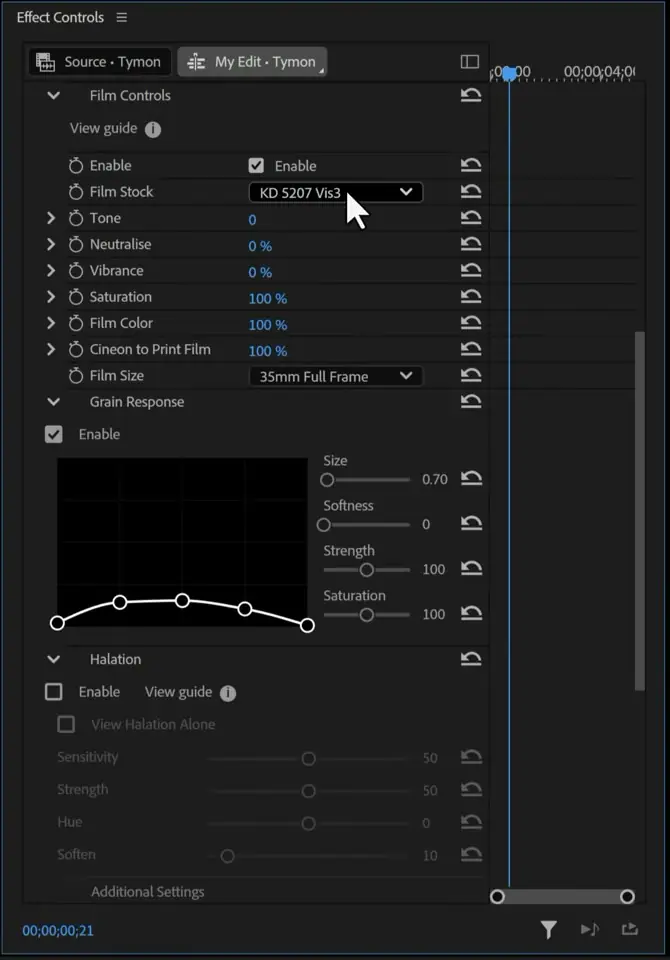
Then you shape the stock. My favorite control here is Film Color, because it can change the whole emotion of a shot. Grain Response gives you the same kind of control over the grain. Halation is the other one I love: it mimics the soft glow that bright highlights get on real film.
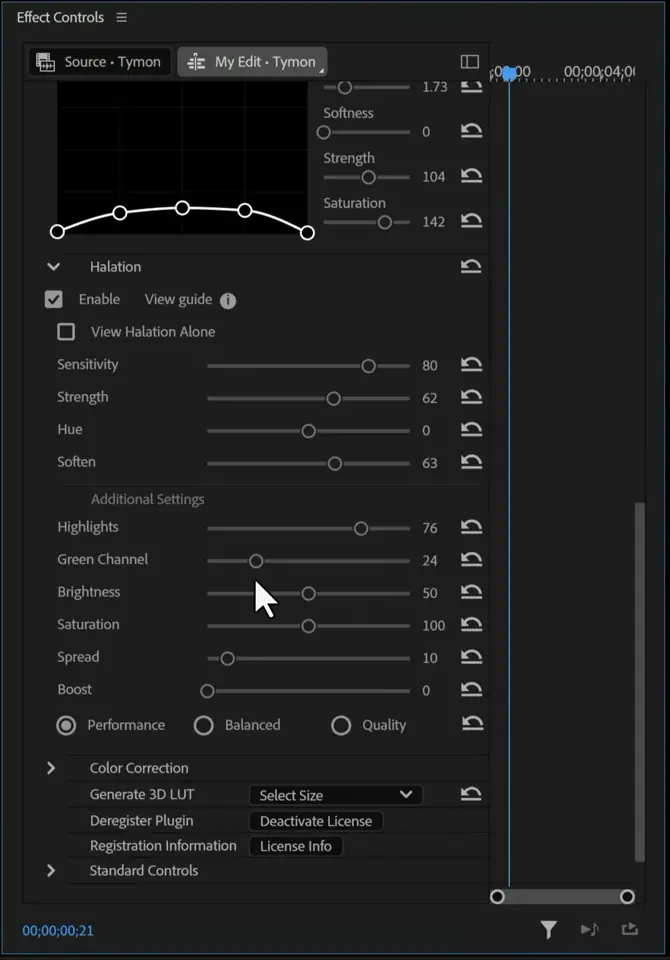
One limitation. This effect can be heavy, so Nitrate lets you choose between Performance, Balanced and Quality. The computer used for this video is five years old and had no trouble playing back at high quality, but test it on your own machine. If you'd rather start from a finished look without a plugin, my Ultimate Blockbuster LUT Pack has the looks of 20 famous series and movies, for LOG and Rec. 709 footage.
Fix skin tones with HSL Secondary
At 3:58 in the video above, the skin looks almost like a zombie's. To add life to the face only, open HSL Secondary in Lumetri, scroll down to the Key, click the color picker and then click the skin in the Program monitor.
I always enable Color/Gray at this point. It turns everything outside your selection gray, so you can see what you're actually grabbing. Now adjust the H, S and L ranges until only the skin keeps its color. This can take a minute. You'll go back and forth between the three.
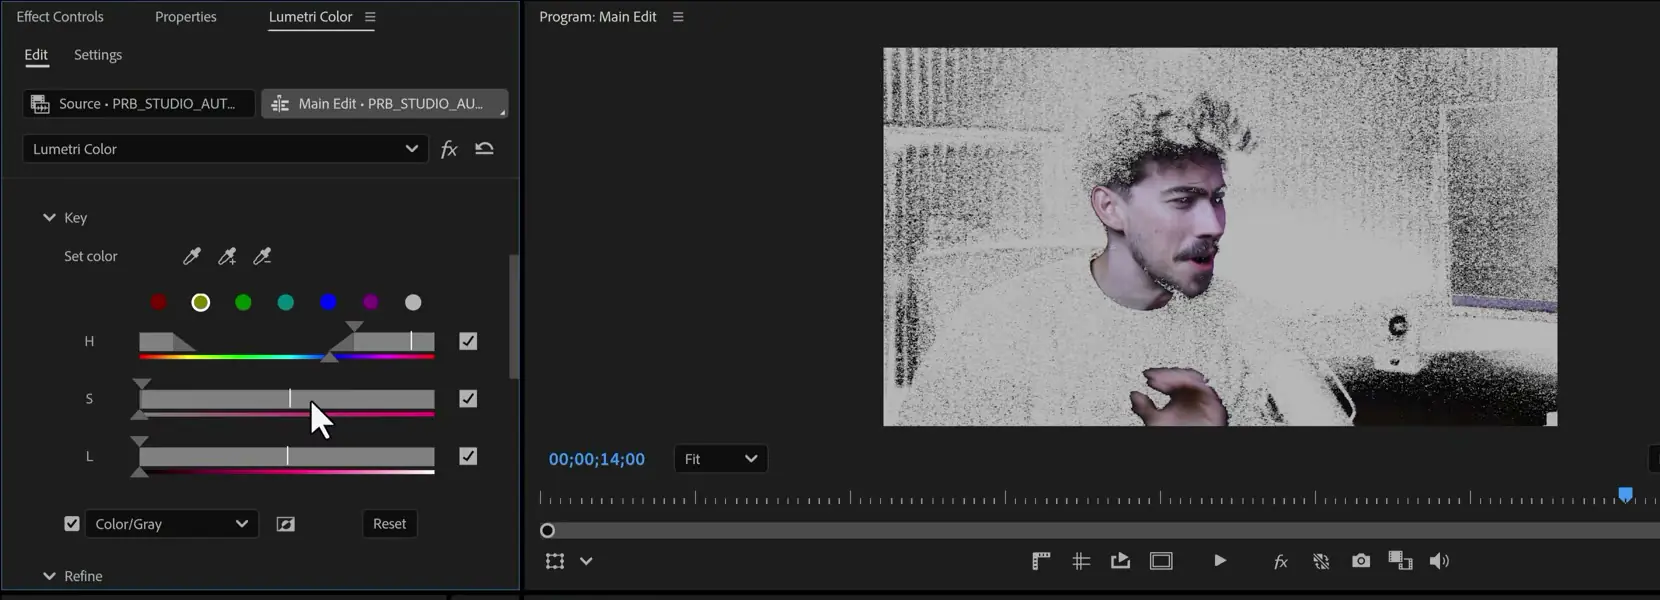
With a clean selection, switch the gray off and scroll to Refine. Raise Blur to get rid of the imperfections. Don't overdo it. Too much gives you a glowy edge that doesn't look good.
Further down you can use the color wheel. I only needed some color in the face, so I raised Temperature a little and left it there. For another approach, try my easy trick for perfect skin tones.
Create a dreamy glow with Gaussian Blur
This one makes a clip feel like a dream, and it's simple. Hold Alt and drag the clip one track up to duplicate it, then find Gaussian Blur in the Effects browser and drag it onto the duplicate. You'll see two versions in that list, because Adobe renamed the older one Gaussian Blur (Legacy) in 26.0.
In Effect Controls, set the Blend Mode under Opacity to Screen or Linear Dodge (Add). Then play with the blur Amount until you're happy. The shot below sits at 25.8 with Screen.
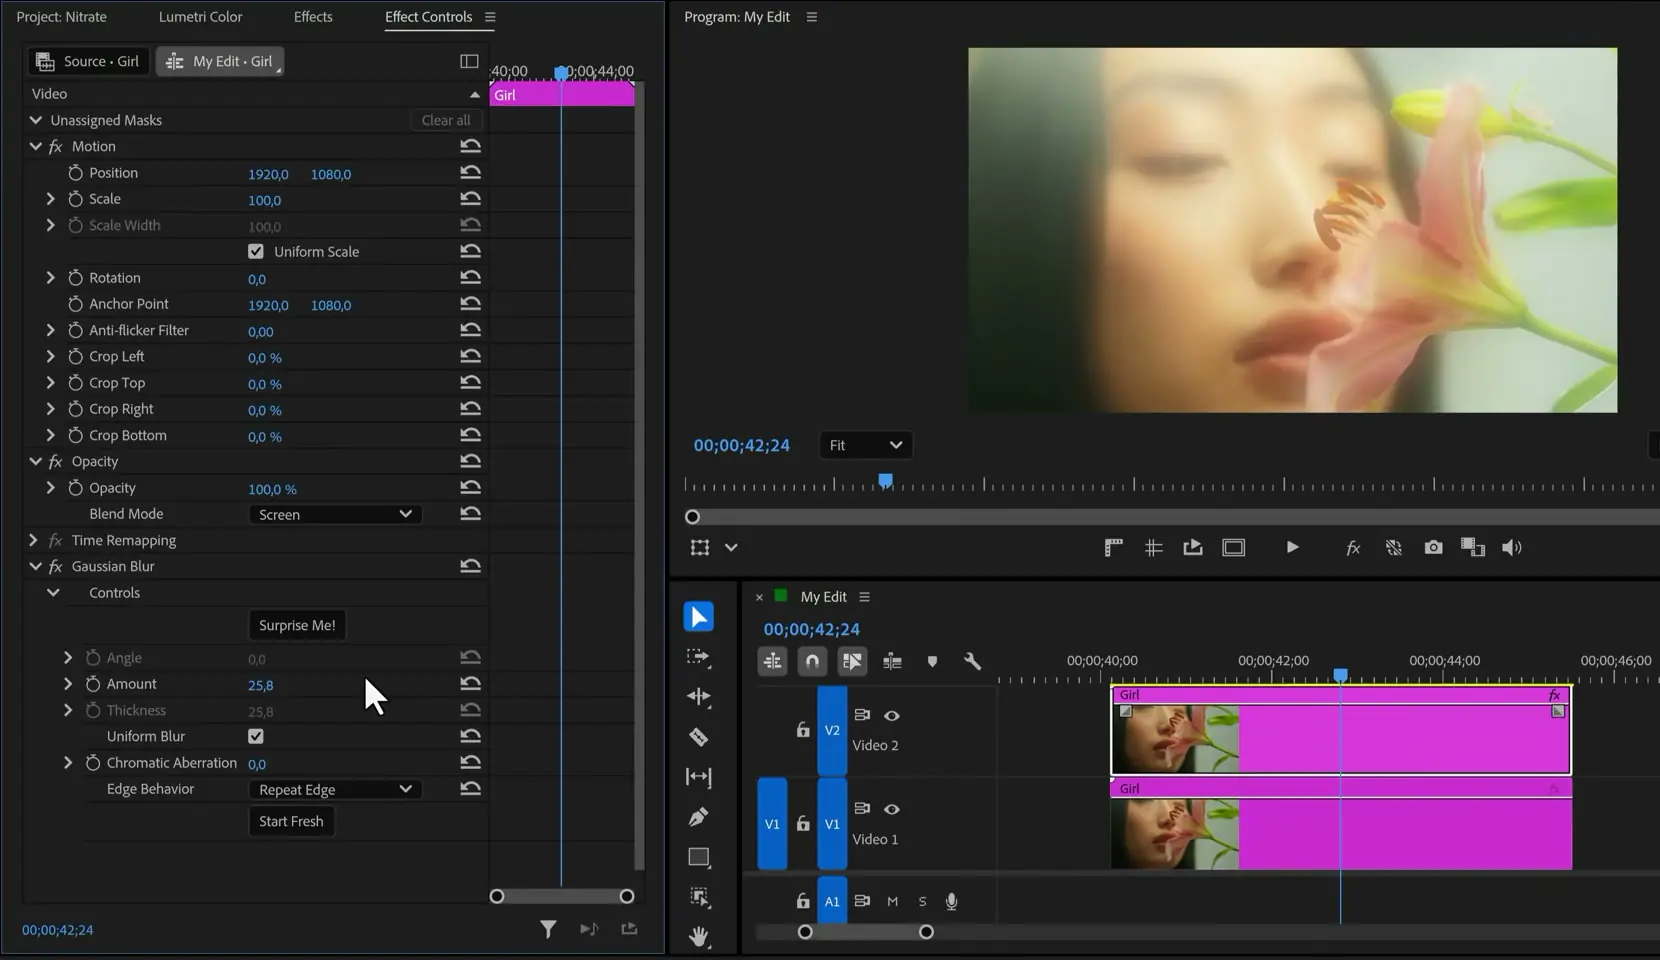
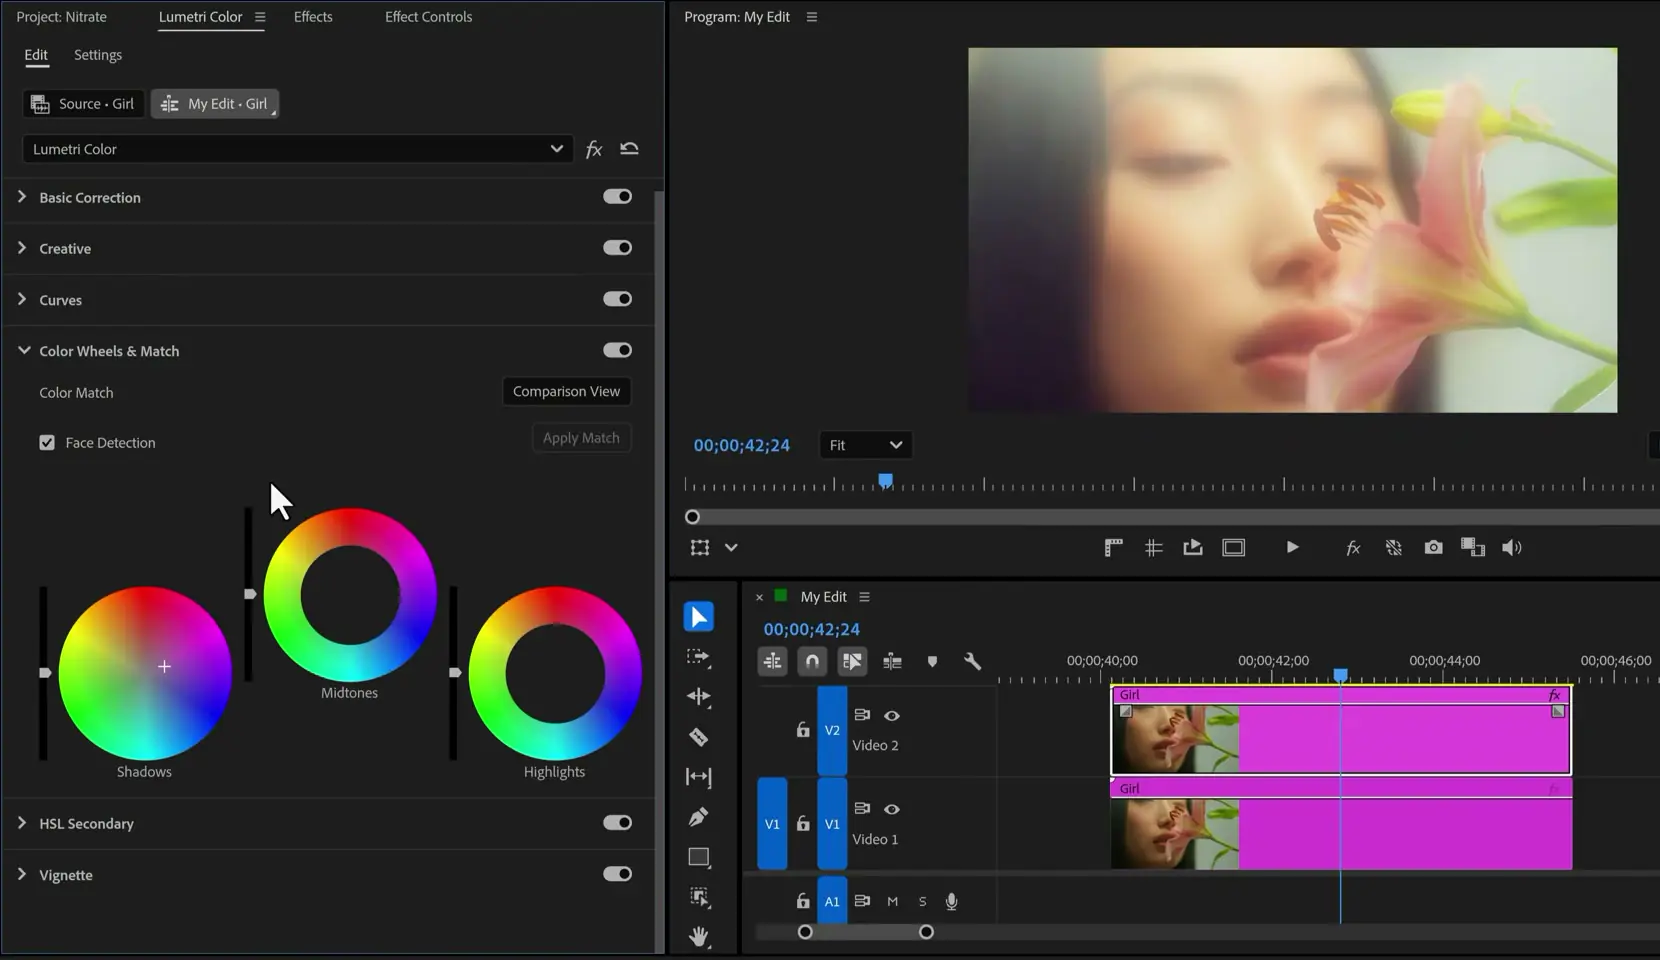
Next, open the Lumetri color wheels. Push a bit of pink into the Shadows wheel. I do this on every dreamy, lo-fi look, and I can't tell you why, but it always works. For more ways to build this kind of light, see my tutorial on how to create glow in Premiere Pro.
Which trick to try first
Start with the Hue vs Sat color pop, because curves show you quickly how Lumetri thinks about color. Use a shot with one strong color in it, like that red car.
With the Lumetri Color panel removed in 27.0, the effect is what stays, so this practice carries over. Open one clip from your current edit and try it today. If you want the full picture, my Premiere Pro Lumetri color grading course takes you through correction and grading with real examples from the first lesson.
Jordy Vandeput
Founder of Cinecom · 2.75M+ subscribers on YouTube
Jordy Vandeput is a Belgian filmmaker who has taught practical filmmaking to millions through Cinecom. He breaks professional techniques down into clear, repeatable steps you can use on your very next project.





0 comments