After Effects 27 New Features: AI Assistant, Contour Paint and More
 Jordy Vandeput
45K views
The After Effects 27 new features, tested hands-on in the beta: the AI Assistant builds a wiggle with its own sliders and organizes your project, Contour Paint turns footage into a painting, and five smaller updates save you clicks every day.
The After Effects 27 new features worth knowing are an AI Assistant that writes expressions and cleans up your project, a Contour Paint effect for painterly looks, a tidier Effect Controls panel with labels, one-click anchor points, Alt-drag duplicating, colored guides and disk caching for Object Matte. The video above shows each one. Here's how they work.
We recorded it in After Effects (Beta) in October, a few weeks before Adobe shipped version 27.0 on November 10, 2026. Some of these tools landed in the 26.5 release in September, and a couple still live in the beta. I'll tell you which is which, so you know where to look.
How to try the After Effects 27 beta features
The beta doesn't touch your normal install. Open the Creative Cloud desktop app, go to the Beta apps tab and install After Effects (Beta). It sits next to your current version as a second app, so your running projects stay safe. Nothing gets replaced.
That matters for client work. I'd never test a brand new feature inside a project with a deadline, and with the beta you don't have to.
Using the AI Assistant in After Effects
You open it from Window > AI Assistant (beta). In the video we docked it on the right side of the workspace, next to the Preview panel. You type what you want in plain English, the same way you'd ask a colleague.
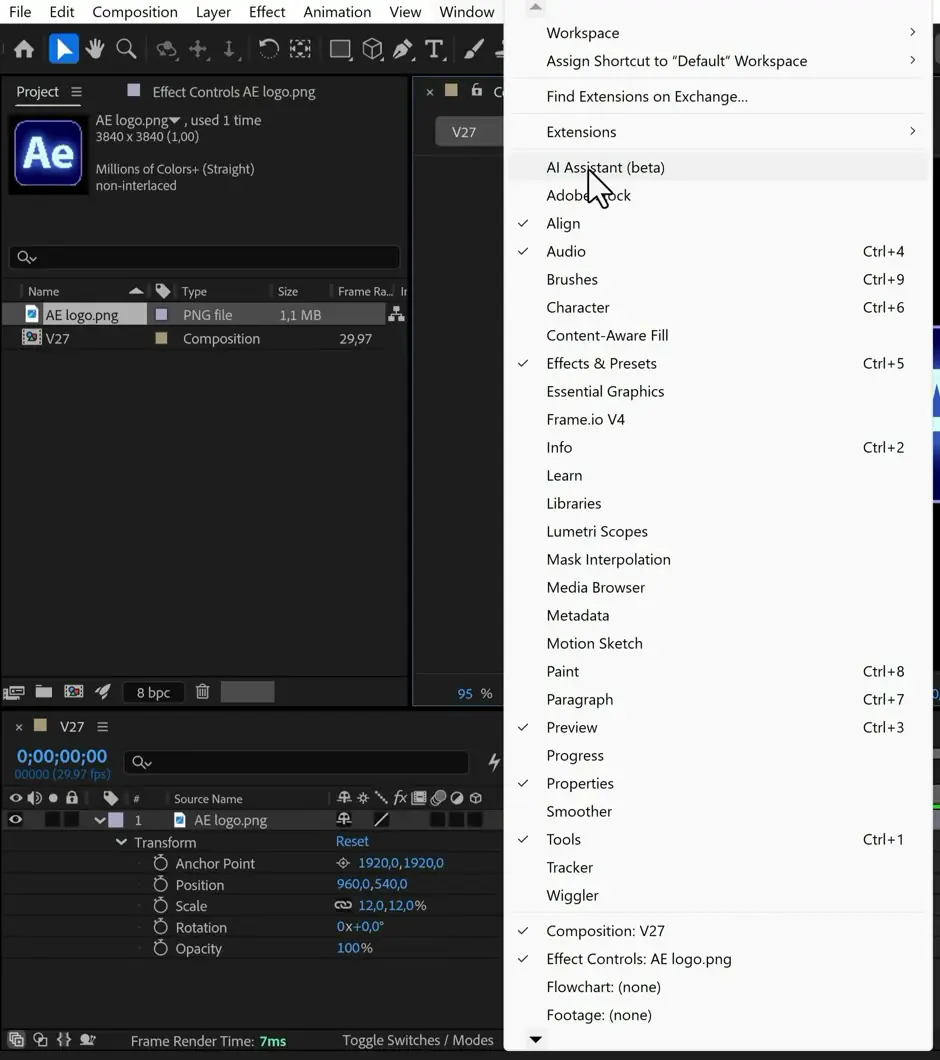
Asking for a wiggle animation
The test prompt was simple. Add a wiggle animation to the After Effects logo layer. The assistant wrote a wiggle expression on Position. Then it did something nobody asked for.
It added two sliders to the layer's Effect Controls: Wiggle Frequency set to 2 (two wiggles per second) and Wiggle Amplitude set to 30 (up to 30 pixels from the original position). The expression reads those sliders, so you can tune the wiggle without opening the code. Smart move. Tymon, who hosts the video, honestly did not expect that, and it's exactly how an experienced motion designer would set it up.
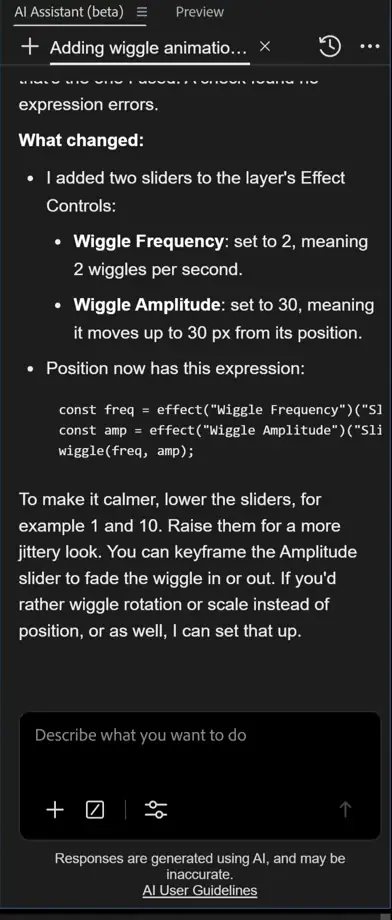
The assistant also explains what it changed and suggests next steps, like lowering the sliders to 1 and 10 for a calmer move or keyframing the amplitude to fade the wiggle in. If wiggles are new to you, my list of five After Effects expressions you must know shows what that code does under the hood.
Letting it organize your project
The second prompt was "Organize my project." The assistant looked at everything in the Project panel, sorted it into a Comps folder and a Footage folder, and renamed the items. You just ask and let it do its thing.
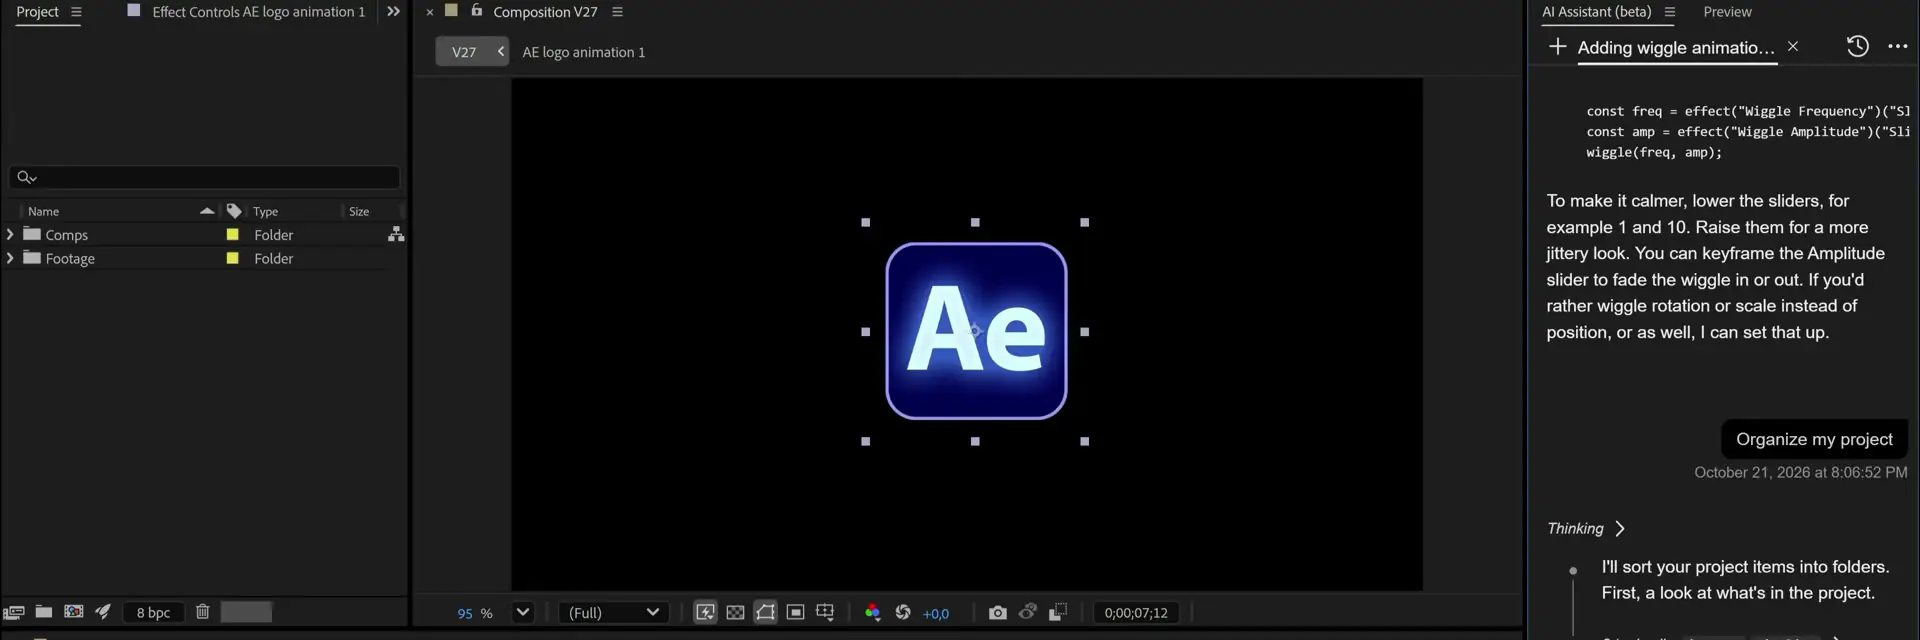
One caveat before you lean on it. According to Adobe's AI Assistant overview, most generative actions use generative credits, and availability depends on your region and license. The panel itself also warns that responses may be inaccurate, so check what it did before you hand off a project.
Contour Paint: a painterly look in one effect
Contour Paint sits under Stylize in the Effects & Presets panel. It smears your footage along its edges and can reduce the colors to flat, hand-drawn looking fills. It looks like a painting. Not like video.
The settings are grouped in sections: External Edge Map, Map Modifications, Contour Smearing and Color Reduction. In the video we only touched the smearing properties (Stylization, Cleanliness and Smear Iterations), and the difference is already obvious on the neon body paint shot. The Draw Color Fills option under Color Reduction is what turns the colors into flat fills.
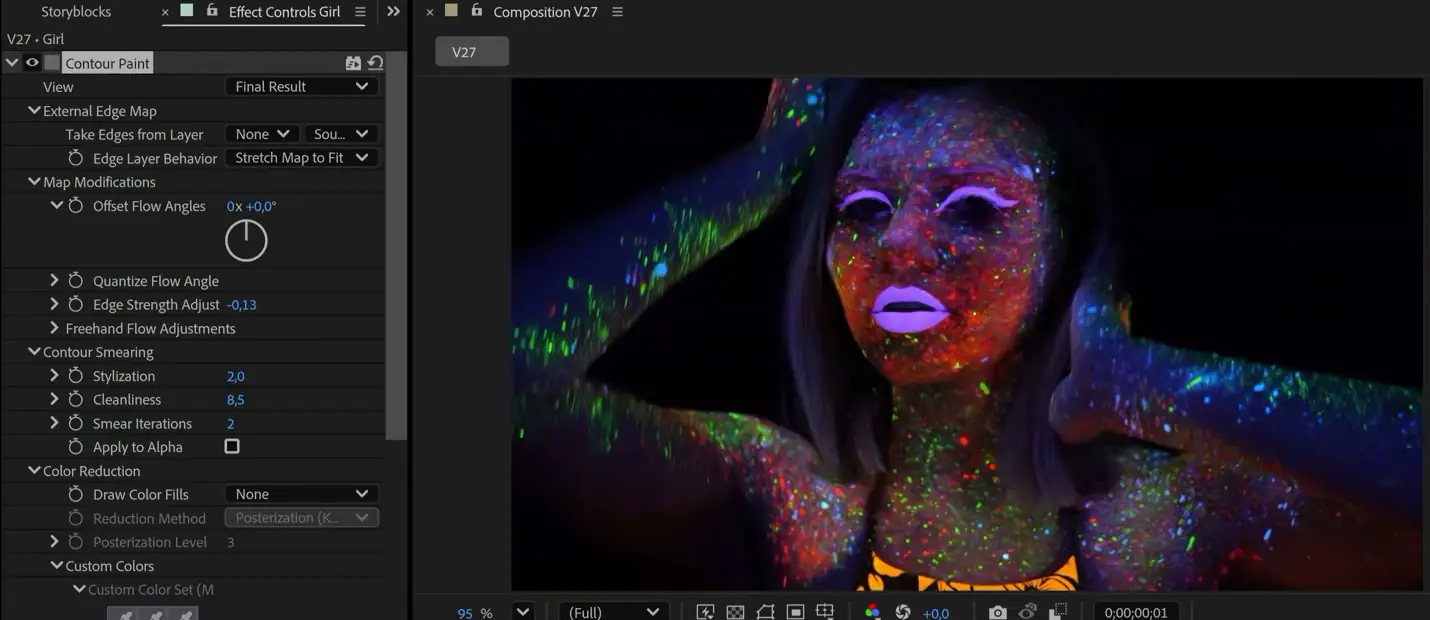
Give this one time. Small changes to the flow angles and smearing push the look in very different directions, and you can get some very cool stylized shots out of it.
A redesigned Effect Controls panel with labels
You might notice that the Effect Controls panel looks different. It got a cleaner design, and you can now give each effect a color label, the same way you label layers in the timeline. Click the small swatch next to the effect name and pick a color from Select Label Group.
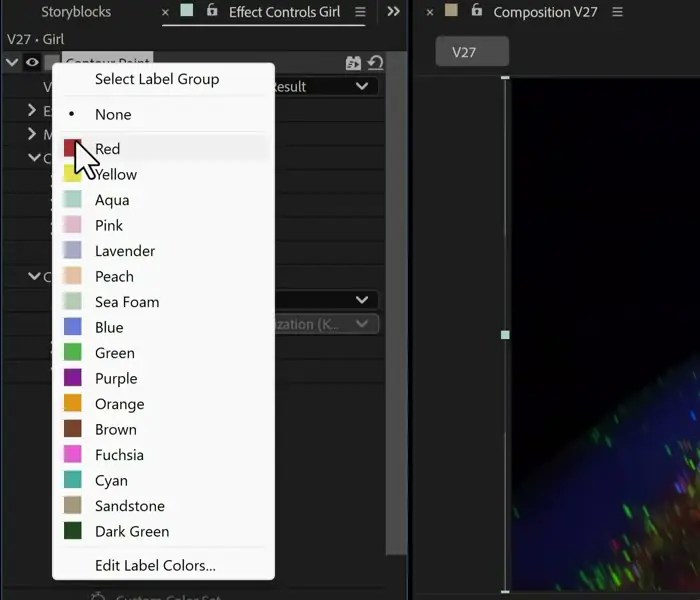
On a layer with six or seven effects stacked up, that makes it much faster to find the one you need. Hiding effects works like before. Nothing to relearn there. Adobe shipped this redesign in the 26.5 release, so you have it in the regular version too.
Smaller After Effects 27 updates that save clicks
These are the quieter changes. They won't make headlines, but you'll use them every day.
Set the anchor point from the Properties panel
Remember grabbing the anchor point tool and dragging the anchor point around by hand? You can skip that now. In the Properties panel, click the small anchor point icon next to Anchor Point and pick one of nine positions: the corners, the edge centers or the middle. Adobe calls this Quick Set Anchor.
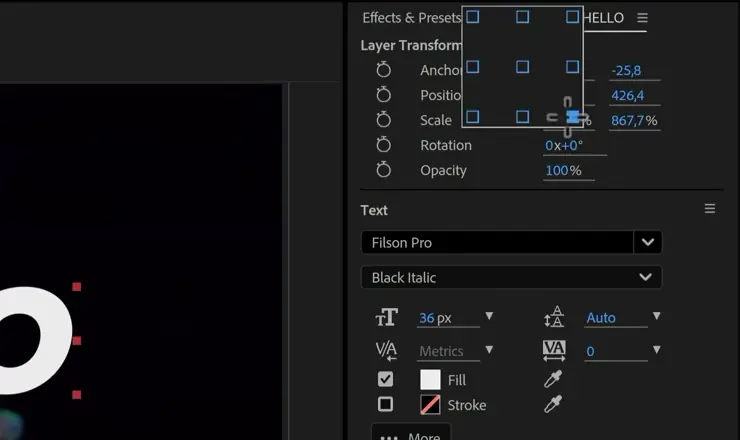
About 90% of the time an anchor point needs to sit in one of those spots anyway, so this saves a lot of fiddling. When we checked, it was still a beta feature, so look for it in After Effects (Beta) if your regular install doesn't have it.
Duplicate a layer with Alt-drag
Hold Alt (Option on a Mac) and drag a layer in the Composition panel. You get an identical copy. Small update, but useful. If you like speeding up your edits this way, my 17 must-know After Effects shortcuts cover the rest.
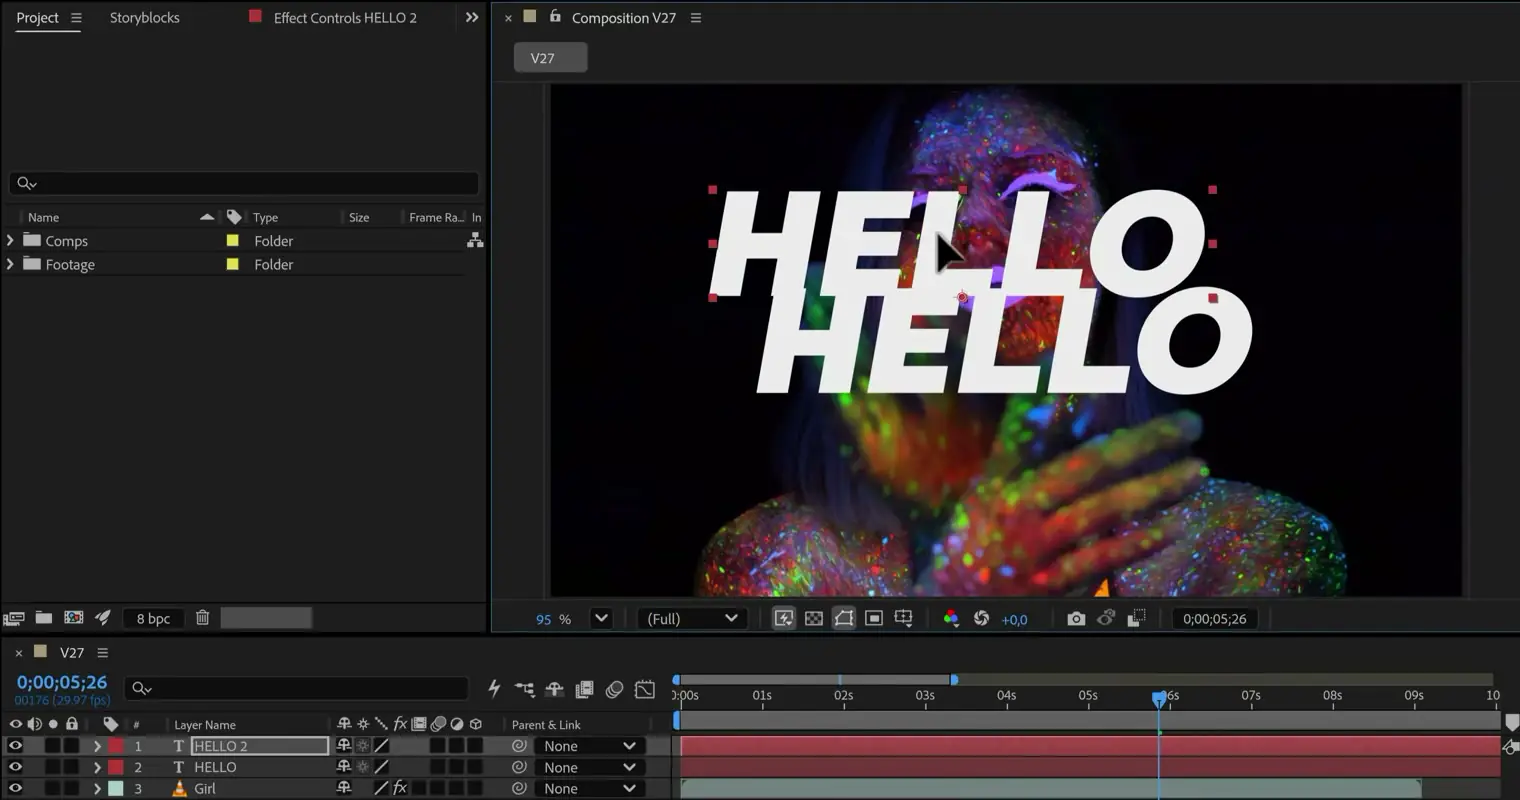
Like the anchor point shortcut, this one was still listed as a beta feature when we checked.
Give every guide its own color
Turn on the rulers in the Composition panel and drag a few guides in. Now right-click a guide and choose Edit Guide. The dialog lets you set the Position, the Units, the Orientation and a Color for that one guide.
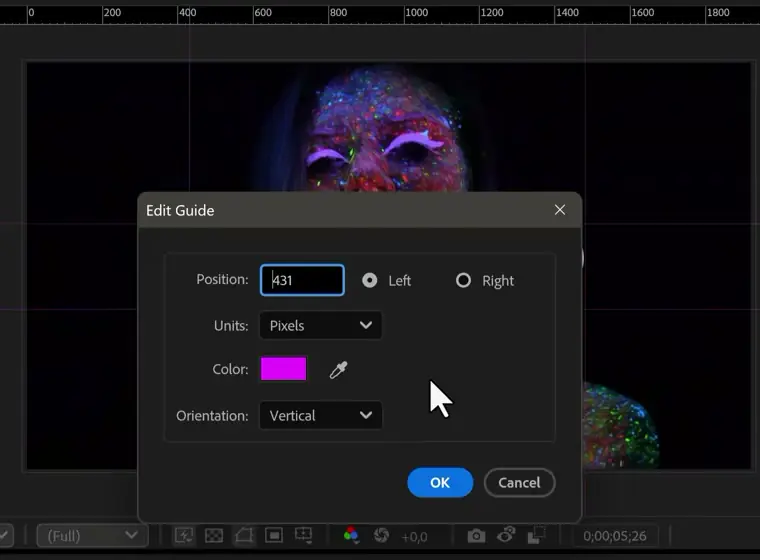
In the video we turned a single guide green to show it. Different colors for title-safe lines, center lines and layout grids make a busy comp much easier to read. This also arrived in release 26.5.
Disk caching for Object Matte
The last update you can't see, but you'll feel it. After Effects now saves your Object Matte tracking results to disk, so you don't have to process them again after reopening the project. Less waiting. It also frees up RAM and speeds up your work, especially on longer clips. We still wonder why that took so long.
What came before: the June update
If you missed the June release (26.3), it added depth of field for 3D models, copy and paste for SVG files and a faster mask tracker. For a look at how far 3D in After Effects has come, read my earlier write-up on the true 3D workspace update. Adobe keeps a full list of what shipped in its After Effects 27.0 announcement.
Try the After Effects 27 new features on your next project
Start with the AI Assistant on something low-stakes, like a wiggle on a logo, and see how its slider setup compares to yours. Then drop Contour Paint on a colorful clip and play with the smearing. If you're still finding your way around panels like Effect Controls and Properties, my Get Started with Adobe After Effects 2026 course walks you through the whole program step by step, and these After Effects 27 new features will make a lot more sense after it.
Jordy Vandeput
Founder of Cinecom · 2.75M+ subscribers on YouTube
Jordy Vandeput is a Belgian filmmaker who has taught practical filmmaking to millions through Cinecom. He breaks professional techniques down into clear, repeatable steps you can use on your very next project.
Related tutorials
 179K
6:18
This New After Effects Update is Insane!
Learn how to use the newest 3D Beta feature from Adobe After Effects in this tutorial. Creating realistic renders has never been easier.
 61K
10:14

Is the NEW Rotobrush 3.0 Actually Better?
I tried out the new Rotobrush 3.0 In Adobe After Effects. Find out together with me if this new tool is worth it.
 46K
5:29
This Easy VFX Trick Will Blow Your Mind!
Learn how to create a realistic gun shot wound effect in this tutorial with the help of some practical tools and Adobe After Effects.
0 comments