Vintage Audio Effect in Premiere Pro with Free Plugins
Get a vintage audio effect in Premiere Pro with two free Cymatics plugins: Origin for old tape and radio sound, Memory for a soft analog chorus. Plus three more free plugins worth installing: Smoothify, Premiere Composer and Film Impact.
Want a vintage audio effect in Premiere Pro without paying for a plugin? Install the free Cymatics Origin, drag it onto your audio clip, click Edit in the Effect Controls panel and pick a preset like Subtle Tape. That's it. For a softer, wobbly feel, Cymatics Memory works the same way and adds a mix slider to blend it in.
Both plugins are free. No trial, no watermark. They were made for music producers who want their tracks to sound like an old tape, but they run just as well on a song or a voice clip inside Premiere Pro. Below I walk through both, and then three more free plugins from the same video that are worth having: Smoothify, Premiere Composer and Film Impact.
How to add a vintage audio effect in Premiere Pro
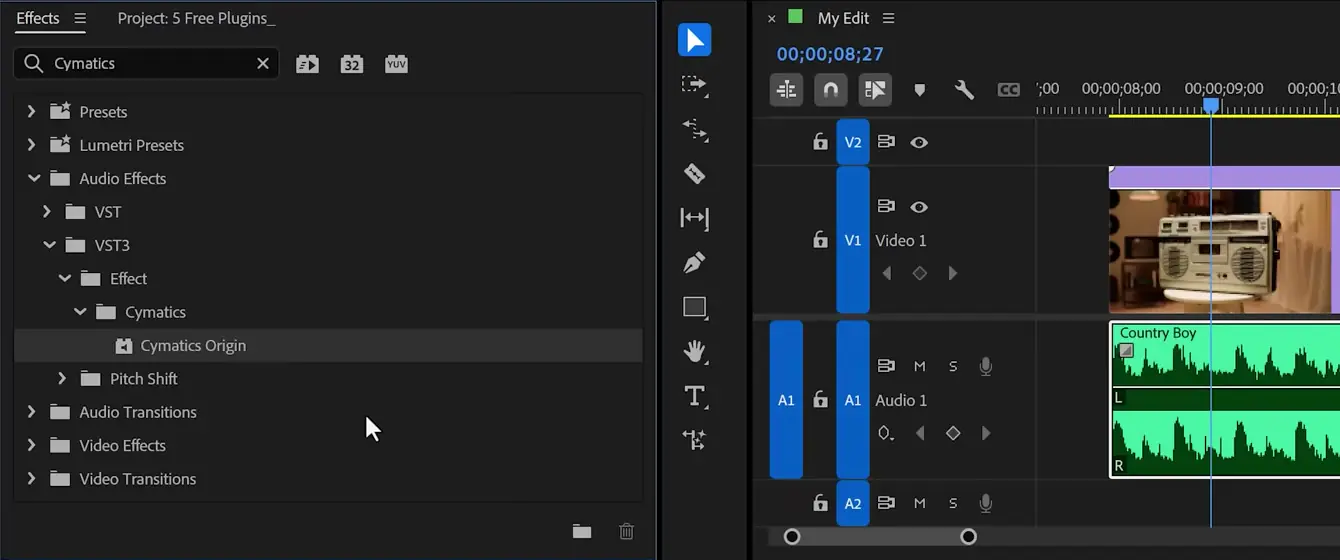
Origin is a VST3 audio plugin, so once the installer has done its thing, Premiere lists it in the Effects panel right next to the audio effects you already know. Here's the whole process. You can follow along at 1:25 in the video above.
- Download Origin from the Cymatics website and run the installer.
- In the Effects panel, search for "Cymatics".
- Drag Cymatics Origin onto your music or voice clip.
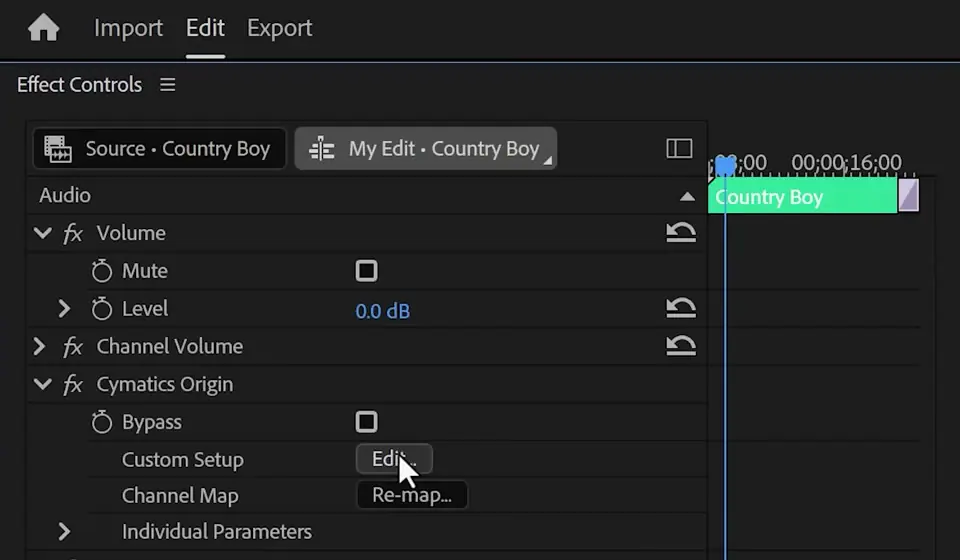
- Select the clip, go to Effect Controls and click Edit next to Custom Setup.
- Open the preset menu at the top right of the plugin window and choose a preset.
- Adjust the knobs while the clip plays, then close the window.
In my project, Origin sat under Audio Effects > VST3 > Effect > Cymatics. Searching the panel is faster than clicking through all those folders.
Doesn't it show up? Premiere has to scan new audio plugins before it lists them. Open the Audio Plug-in Manager (Adobe explains where it lives on its audio preferences help page), click Scan for Plug-ins and make sure Origin is checked.
Open the plugin window from Effect Controls
Audio plugins like this one don't show their knobs in Effect Controls. You only get a Bypass checkbox, the Edit button and a Channel Map. Click Edit and the real interface opens in a floating Clip Fx Editor window, where you get every knob and the full preset menu the plugin was designed around.
Start with a tape preset
Don't start by turning knobs. Origin comes with a long list of factory presets, with names like Record Player, Rusty Radio, Wobbly Tape and Vinyl. I picked Subtle Tape for a song that plays on an old boombox in the shot, and it gives the music that worn cassette color without wrecking the mix.
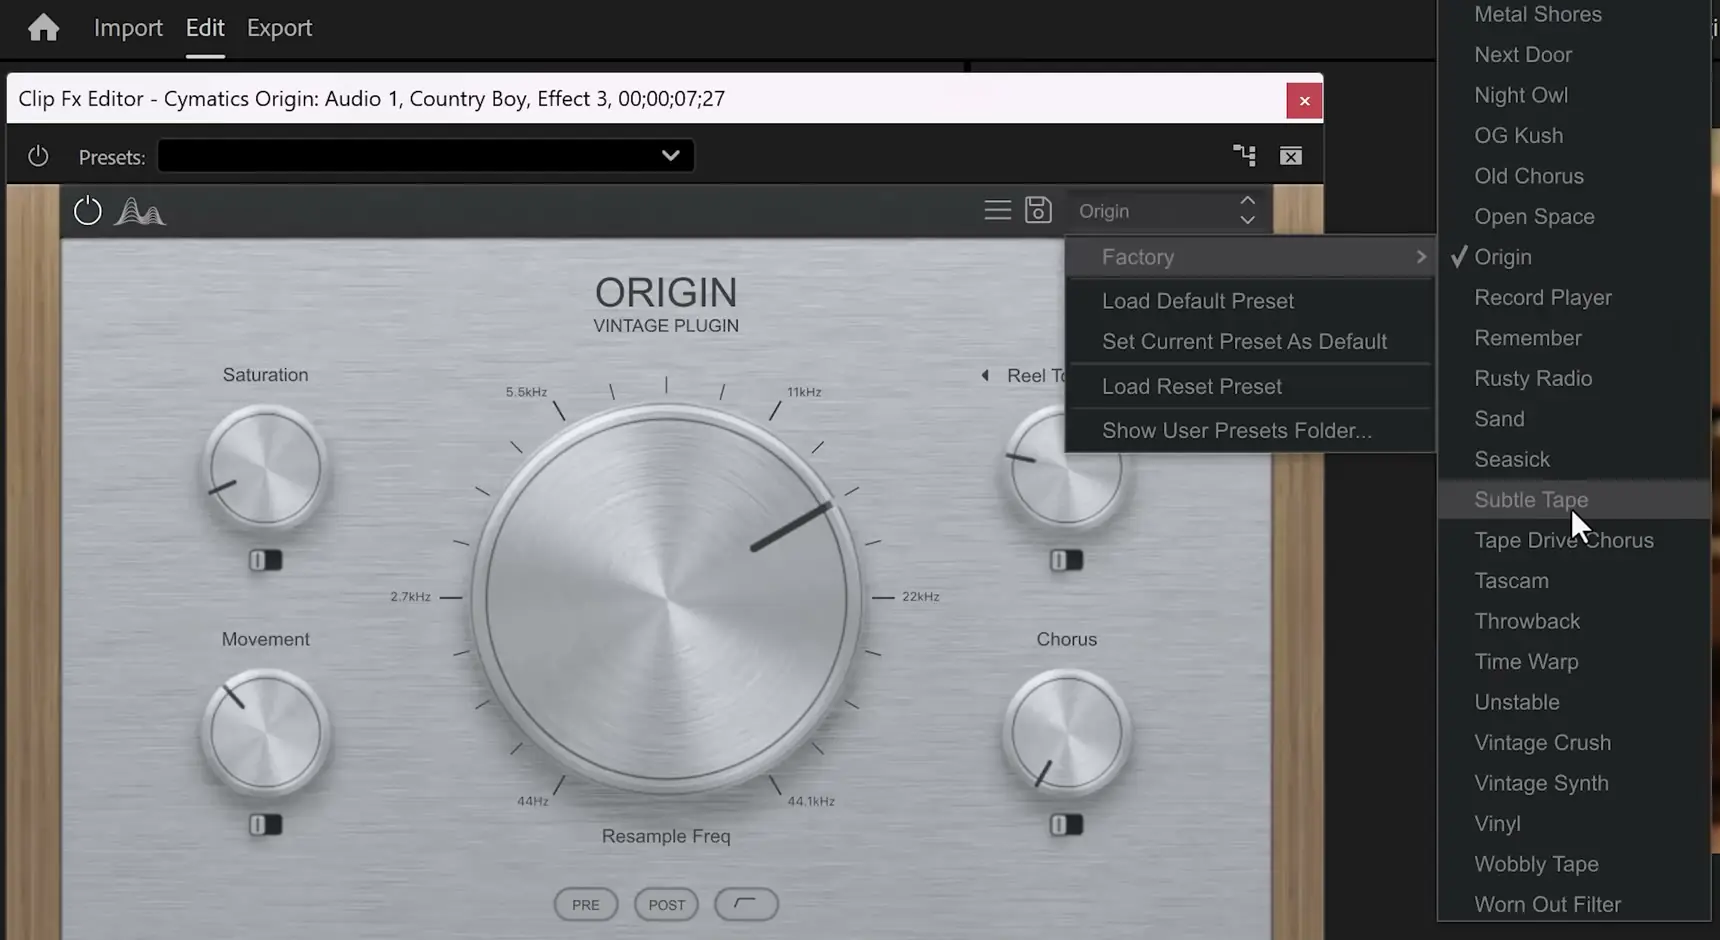
From there, the Saturation, Movement and Chorus knobs and the big Resample Freq dial shape the sound to your liking. Play the clip while you turn them. These settings are impossible to judge by looking at numbers, so trust your ears.
Cymatics Memory: an analog chorus with a mix slider
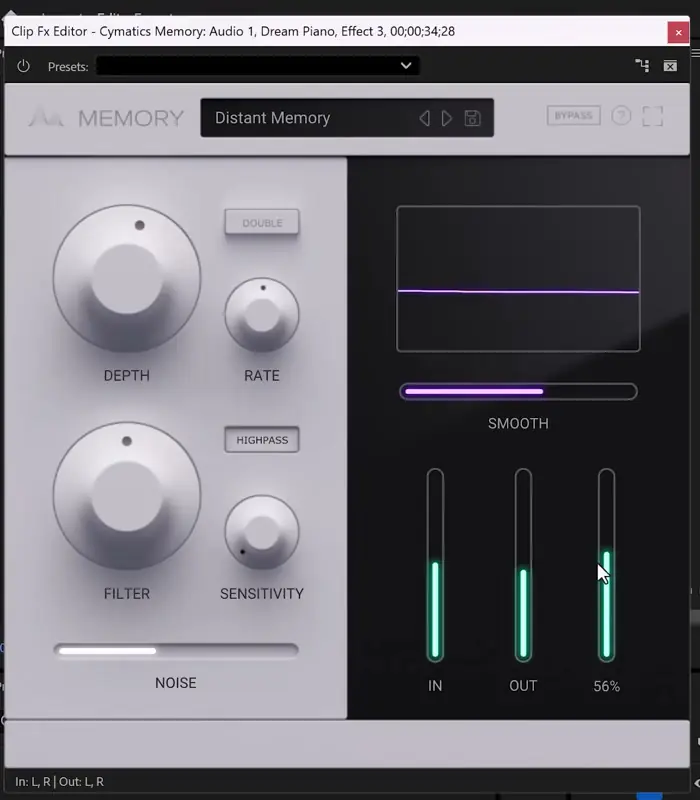
Free plugin number four in the video (at 4:30) is also from Cymatics. Memory is an analog chorus that adds subtle imperfections to your audio. You apply it the same way: drag Cymatics Memory onto the clip, click Edit, then open Factory Presets. I went with Distant Memory on a piano track.
The control I'd reach for first is the mix slider, the third meter next to IN and OUT. Drag it down and you hear the original song. Drag it up and the effect comes in. In the still below it sits at 56%, which keeps the melody clear while it still sounds a little worn.
When a vintage audio effect makes sense
I don't use these two plugins on every edit. But every now and then a shot needs audio that sounds old, and then I'm happy they're installed.
The obvious case is footage of an old radio or cassette player. If the music in that shot sounds like a clean studio master, viewers feel the mismatch right away, even if they could never tell you what exactly bothers them. Put Origin on it and the sound matches the picture. It works on voice too: drop it on a voice clip and your narrator sounds like a news reporter on an old TV set, which you can hear at 2:08 in the video.
One limitation. Both plugins live in a separate window, per clip, so they're slower to tweak than a built-in effect with sliders in Effect Controls. For one shot that's fine. If you'd rather build your own old sound with Premiere's own tools, my sound design tips for Premiere Pro cover EQ, reverb and pitch shifting.
Three more free Premiere Pro plugins from the video
The video shows five free plugins, so here are the other three. None of them is a trial. Back in 2021 I covered a different set of five free plugins for Premiere Pro, if you want even more.
Smoothify: easing curves you can save
Premiere's own velocity graphs are a pain. Animate position and rotation at the same time and you have to shape each velocity curve separately, one property after the other, then guess and hope they match. Smoothify gives you a graph editor that feels like the one in After Effects. You draw a curve once, save it as a preset and give it a name, like IN-OUT.
To apply it, park the playhead between two keyframes. In the Smoothify panel, highlight every animated property (here Position and Rotation), pick your preset and click the play button. Premiere writes that exact curve into your keyframes. For basic animations like this, I don't need After Effects anymore.
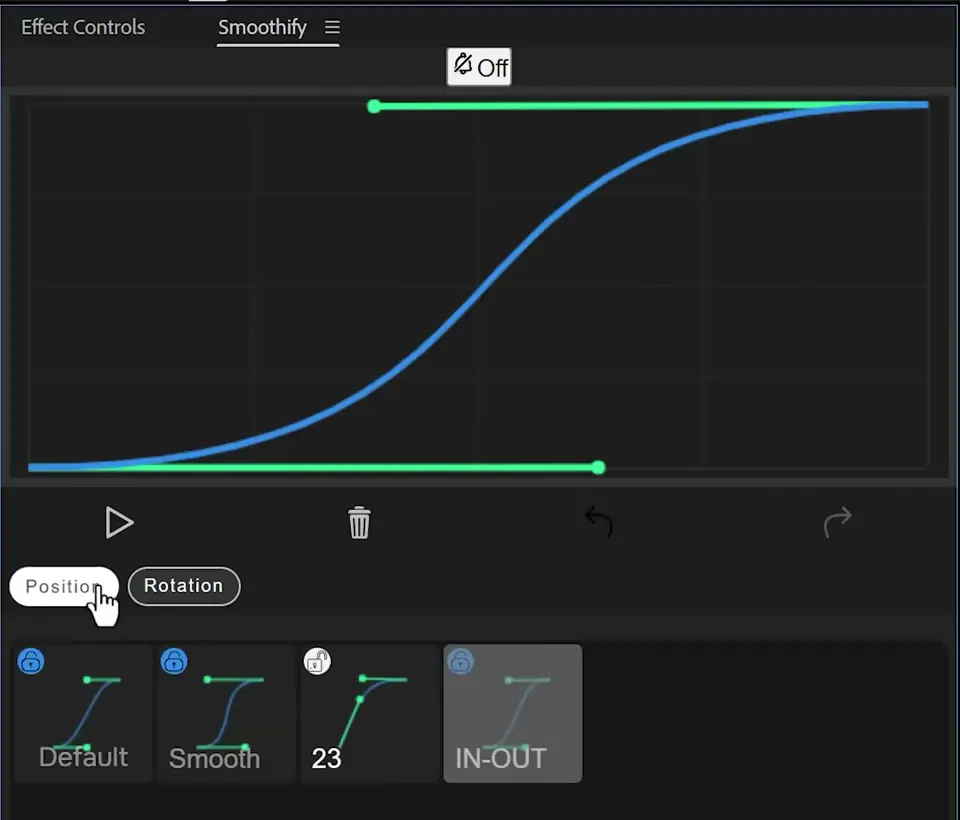
Smoothify now runs inside Blinkl, and I took a closer look at it in Premiere Pro easing curves and 3 more Blinkl tools.
Premiere Composer: a free starter pack
Premiere Composer by Mister Horse opens as its own panel. In the video, the free Starter Pack holds Text Boxes, Text Presets, Transitions, Social Media animations, Shape Elements and Sounds. For a transition, you pick one from the list, switch its built-in sound effect on or off, and drag it on top of the cut between your two clips.
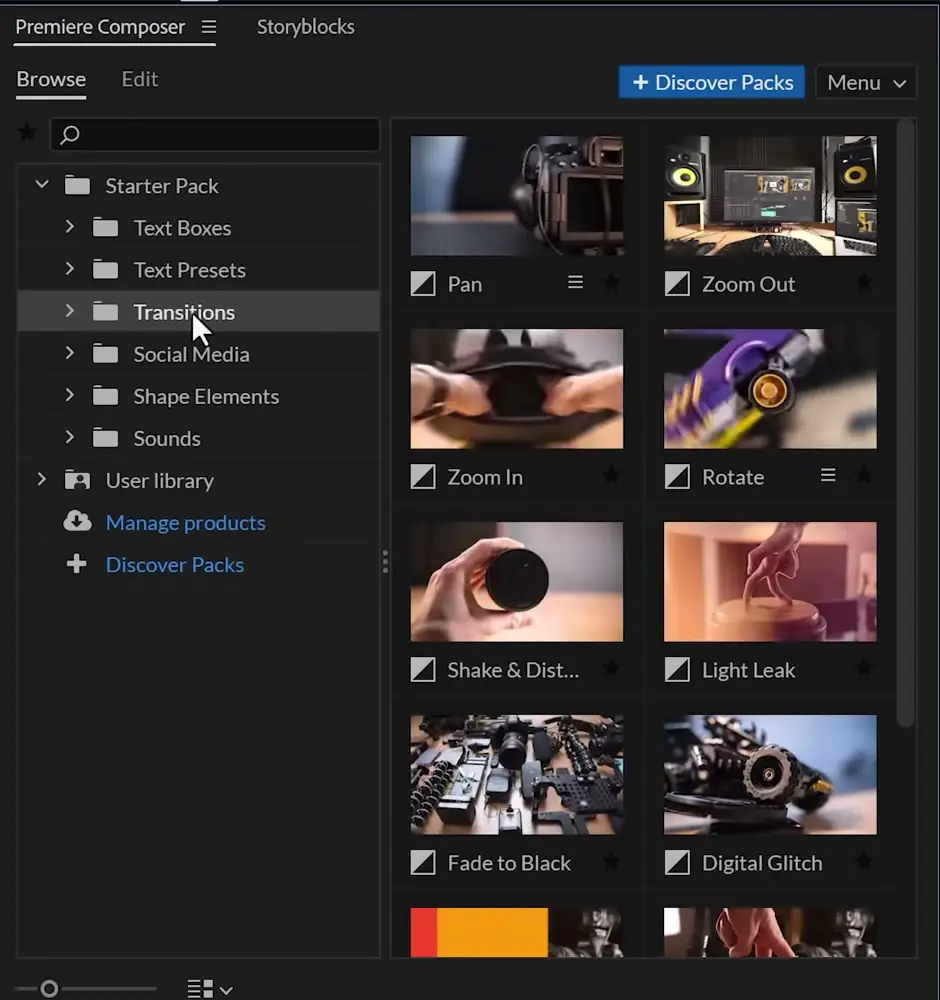
To be fair, since Premiere took in Film Impact, its built-in transitions are good. So this pack matters most if you're on an older version of Premiere. You can buy more packs from Mister Horse, but the free one is a full version, so try that first. Mister Horse has since renamed the plugin Animation Composer, so look for that name on their site.
Film Impact: now built into Premiere
This one used to be paid. Adobe added more than 90 Film Impact effects, transitions and animations to Premiere Pro with version 25.5. There's nothing to download or install: update Premiere through the Creative Cloud app and they're there, along with a Film Impact Dashboard panel that sorts every effect and transition by category.
What I like is that they work like default transitions. No adjustment layers, you just drop them on a cut. You'll also find all of them in the regular Effects panel. My favorite is Rounded Crop, an effect I'd been waiting on for years. Volumetric Rays is the other one to try, because it makes almost any shot look better.
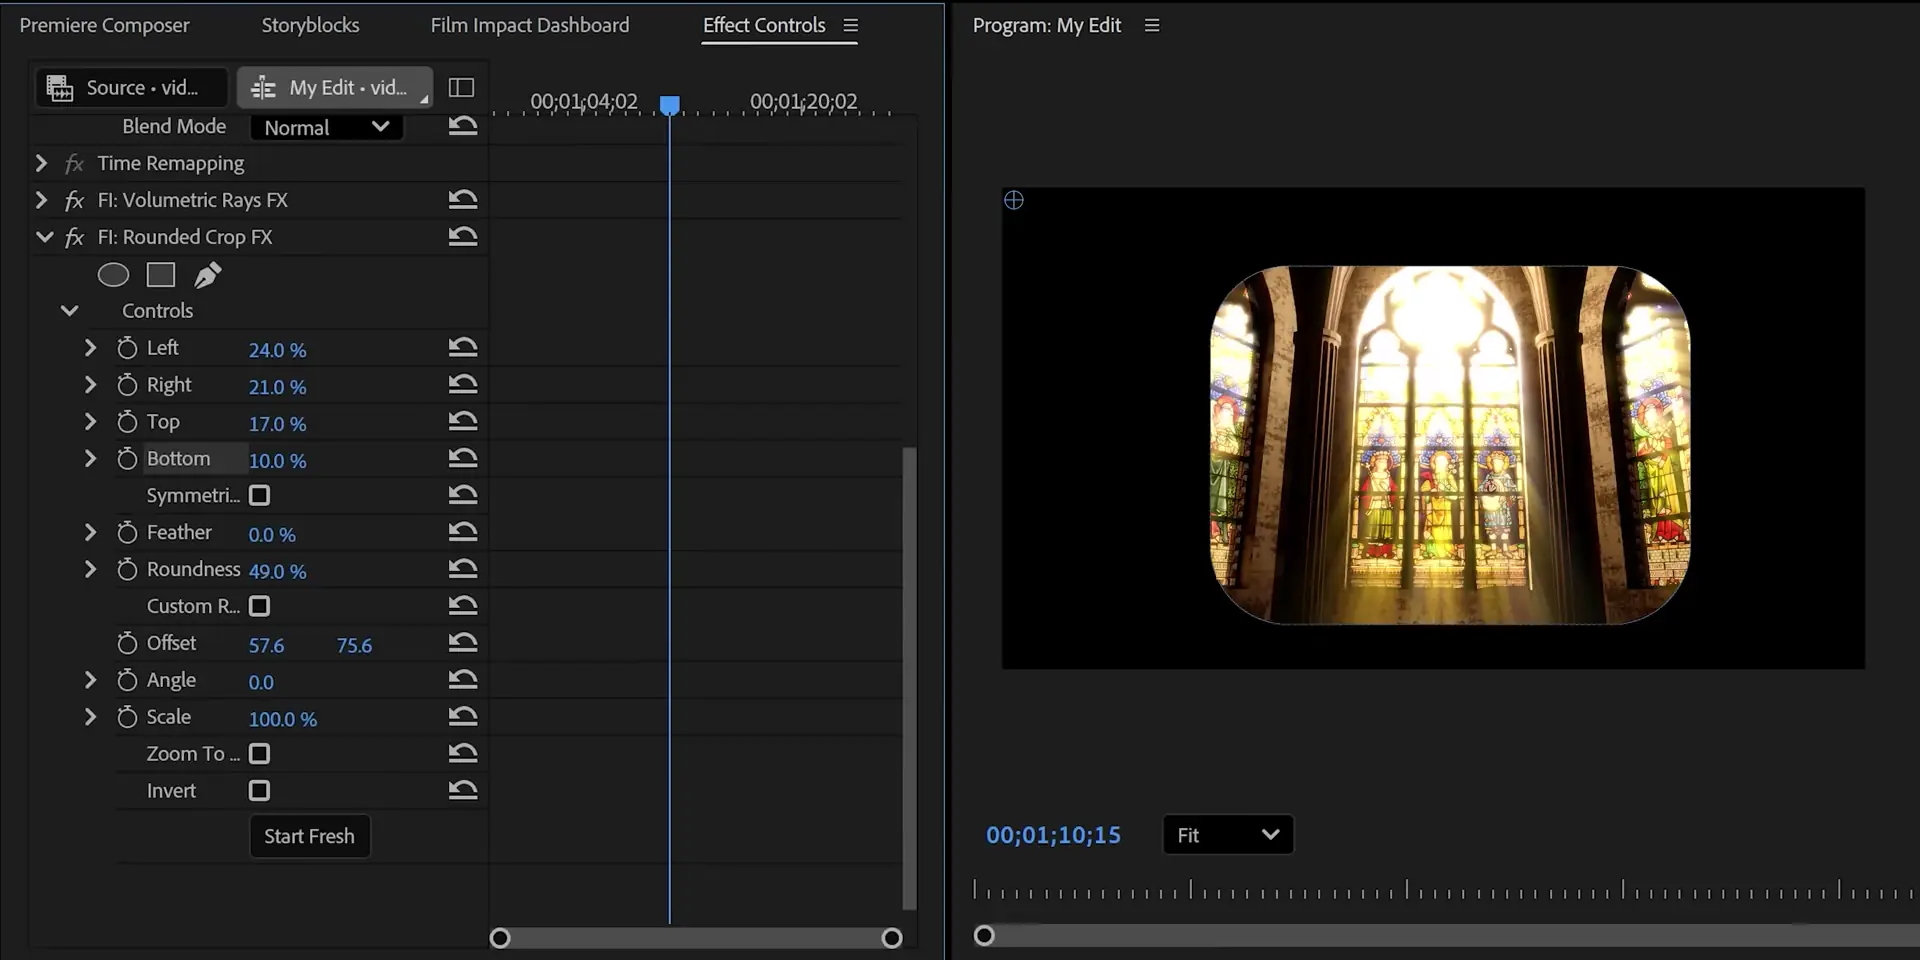
In the video they show up as FI: Rounded Crop FX and FI: Volumetric Rays FX. If that full name doesn't come up in your version, search for just "Rounded Crop". And for more ideas, here's how I use Premiere's built-in transitions instead of keyframes.
Try it on your next edit
Pick one clip in your current project, a radio in the background or a flashback voice-over, and add a vintage audio effect in Premiere Pro with Origin's Subtle Tape preset. It takes two minutes. And if you want the rest of your editing to feel that quick, my Premiere Pro course for beginners takes you through the whole workflow, from the first cut to the export.

Jordy Vandeput
Founder of Cinecom · 2.75M+ subscribers on YouTube
Jordy Vandeput is a Belgian filmmaker who has taught practical filmmaking to millions through Cinecom. He breaks professional techniques down into clear, repeatable steps you can use on your very next project.
Related tutorials
 75K
6:11

5 Editing Tricks You Should Learn IMMEDIATELY!
Learn 5 audio editing tricks for Premiere Pro: beat-syncing, low-pass EQ, AI music search, Automate to Sequence, and EQ for clear dialogue. Practical steps incl
A Music editing trick they won’t tell you!
Learn how to extend reverb and let it fade out smoothly on an audio clip in this Adobe Premiere Pro tutorial.
 7K
8:32

How To Start Your First Podcast With Riverside
Learn how to start your first podcast completely on your own step by step in this Riverside tutorial video.

0 comments