How to Make a Glowing Logo in Premiere Pro (With Light Rays)
 Jordy Vandeput
49K views
Make a glowing logo in Premiere Pro with the Film Impact effects that now ship with Premiere: Volumetric Rays, Glint and Wonder Glow, animated with 3D Rotate. Plus the effect order trick that makes the light react to the movement, and two editing tricks I use every day.
To make a glowing logo in Premiere Pro, cut the logo out of its background and stack three Film Impact effects on it: Volumetric Rays, Glint and Wonder Glow. Add 3D Rotate for movement, then drag it above the glow effects so the light reacts to the motion. No After Effects needed.
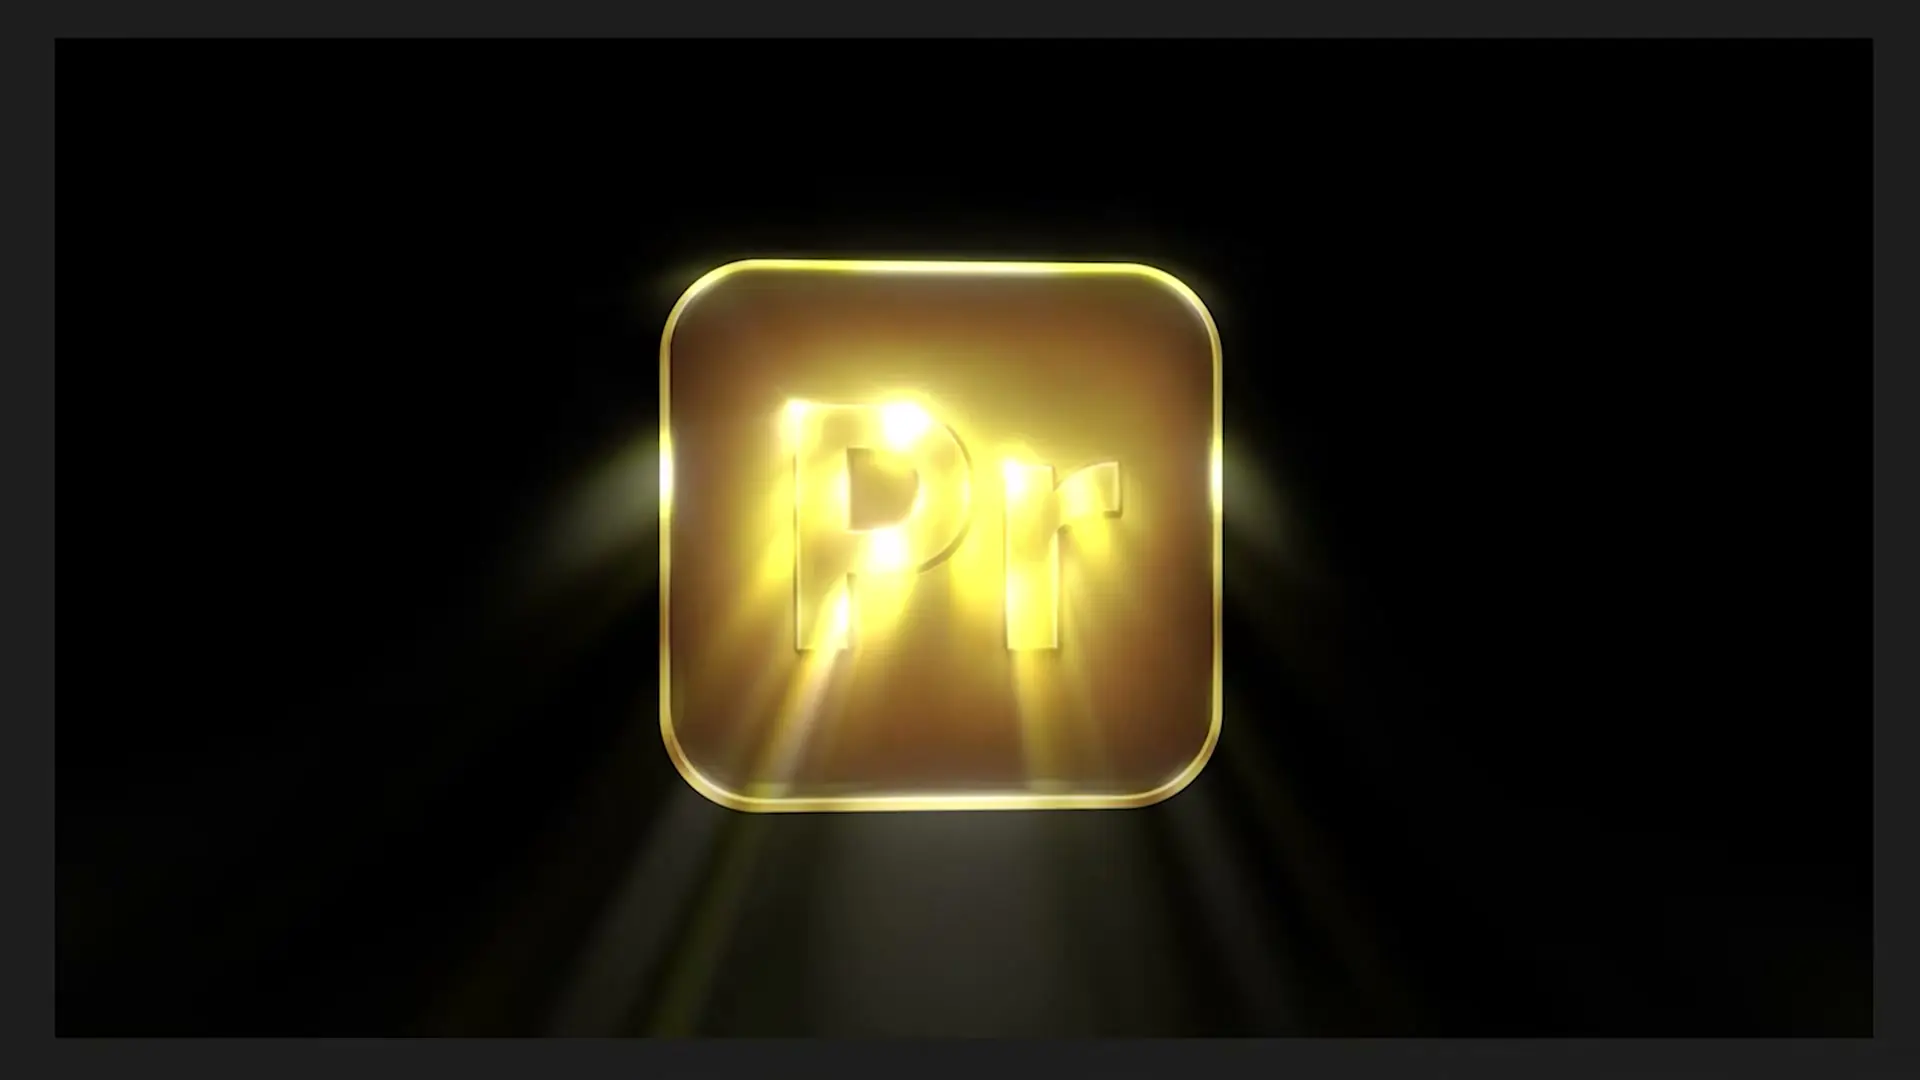
All of these effects ship with Premiere now. Adobe bought Film Impact and added its effects to Premiere Pro with version 25.5 (Adobe's announcement). So if your Premiere is up to date, you already own everything you need for this look, without a single paid plugin or a trip to another program. At 3:39 in the video above you can watch the whole glow build, and it takes less than a minute and a half.
Glowing logo in Premiere Pro: the short version
- Cut the logo out with Logo Cutout (flat logos) or Rounded Crop (rounded-square icons).
- Open Window > Extensions > Film Impact Dashboard and click Lights & Glows.
- Apply Volumetric Rays, then Glint, then Wonder Glow, and tweak each one in Effect Controls.
- Apply 3D Rotate from the Transform category to animate the logo.
- In Effect Controls, drag 3D Rotate above the three glow effects.
Below I go through each step with the settings I used. After that come two more tricks from the same video that I use on almost every edit.
Step 1: remove the logo background in Premiere
Start with a clean logo. If it still sits on a white or gray card, you'll end up with a glowing card instead of a glowing logo, and that looks cheap the moment the light hits the edges. You don't need Photoshop to fix that.
Logo Cutout for flat logos
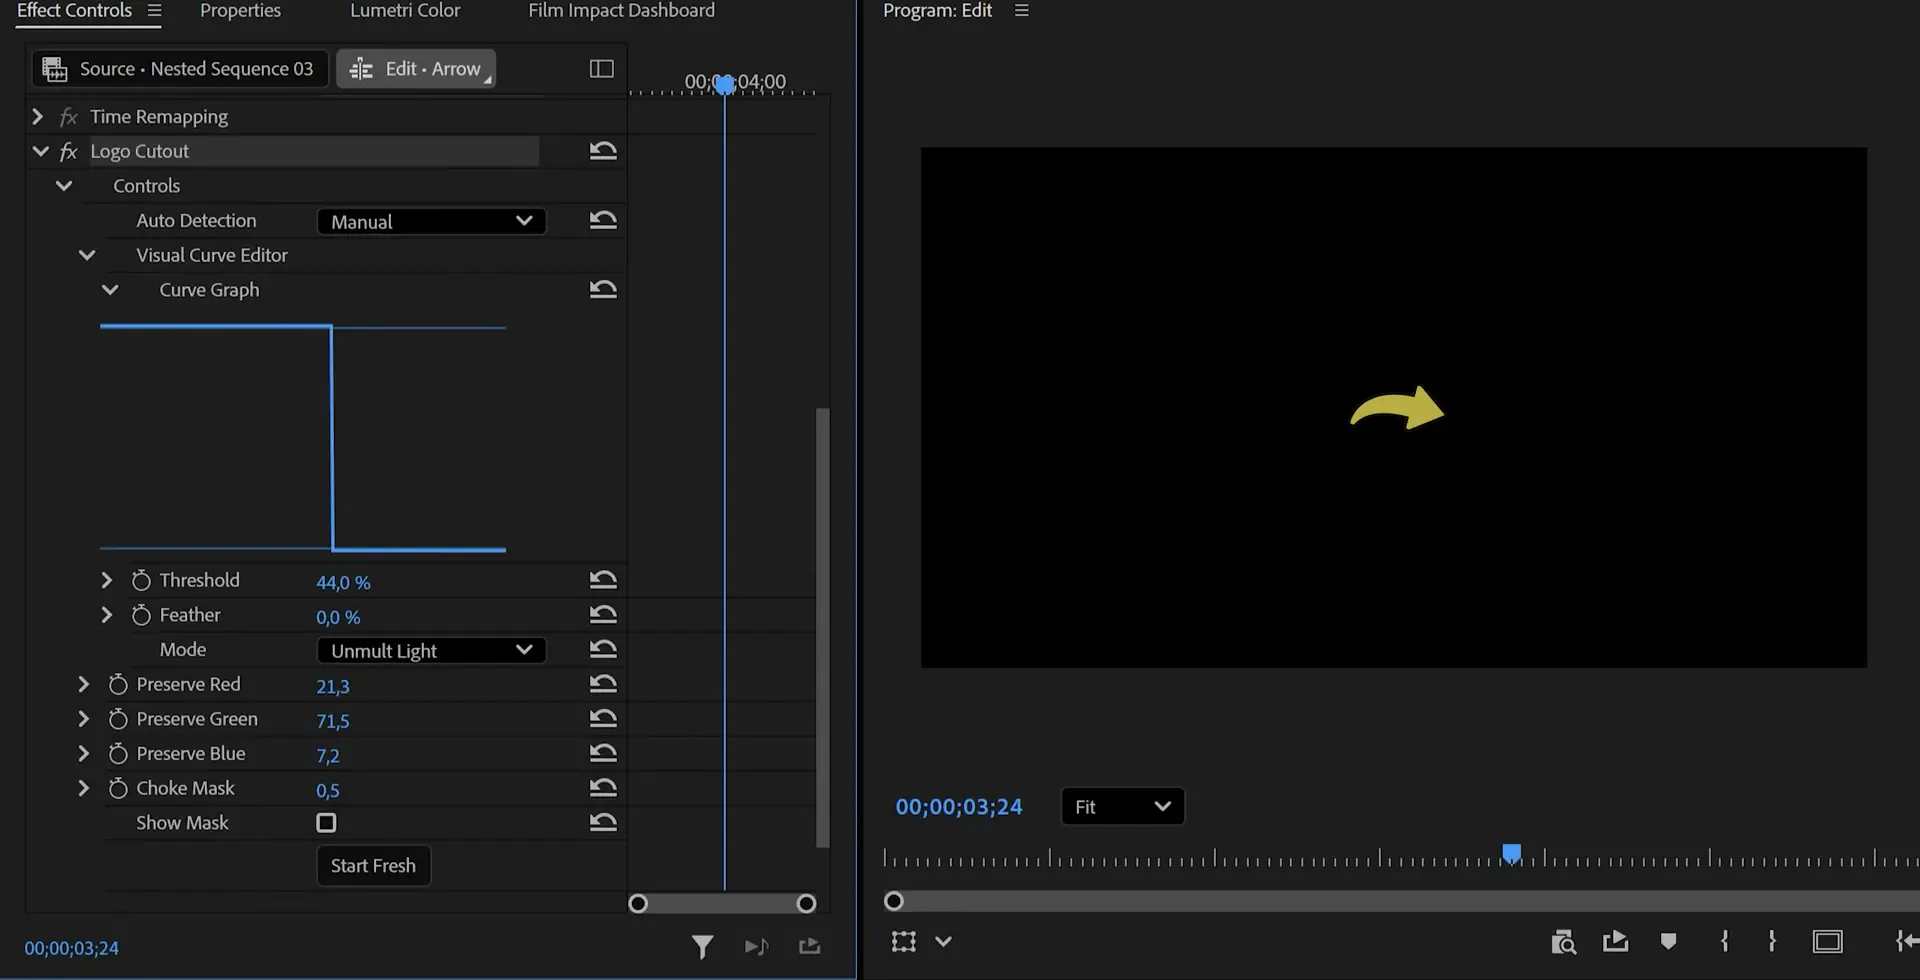
Drag the Logo Cutout effect onto your logo clip. It already does something on its own. The result is rarely clean, though. Open Effect Controls and set Auto Detection to Manual. Then switch Mode to Unmult Light and lower the Threshold until only the logo is left.
The threshold is simply the cutoff point between what counts as background and what counts as logo. On the arrow icon in the video it landed at 44%. I always pull the Feather down to 0 as well. That keeps the edges sharp instead of soft.
Here's the catch. Logo Cutout doesn't work on every logo. I tried it on a golden Premiere icon full of shading and highlights, and instead of removing the background it punched big black holes right into the letters. You can keep tweaking, but sometimes it just won't get there.
Rounded Crop for app-style icons
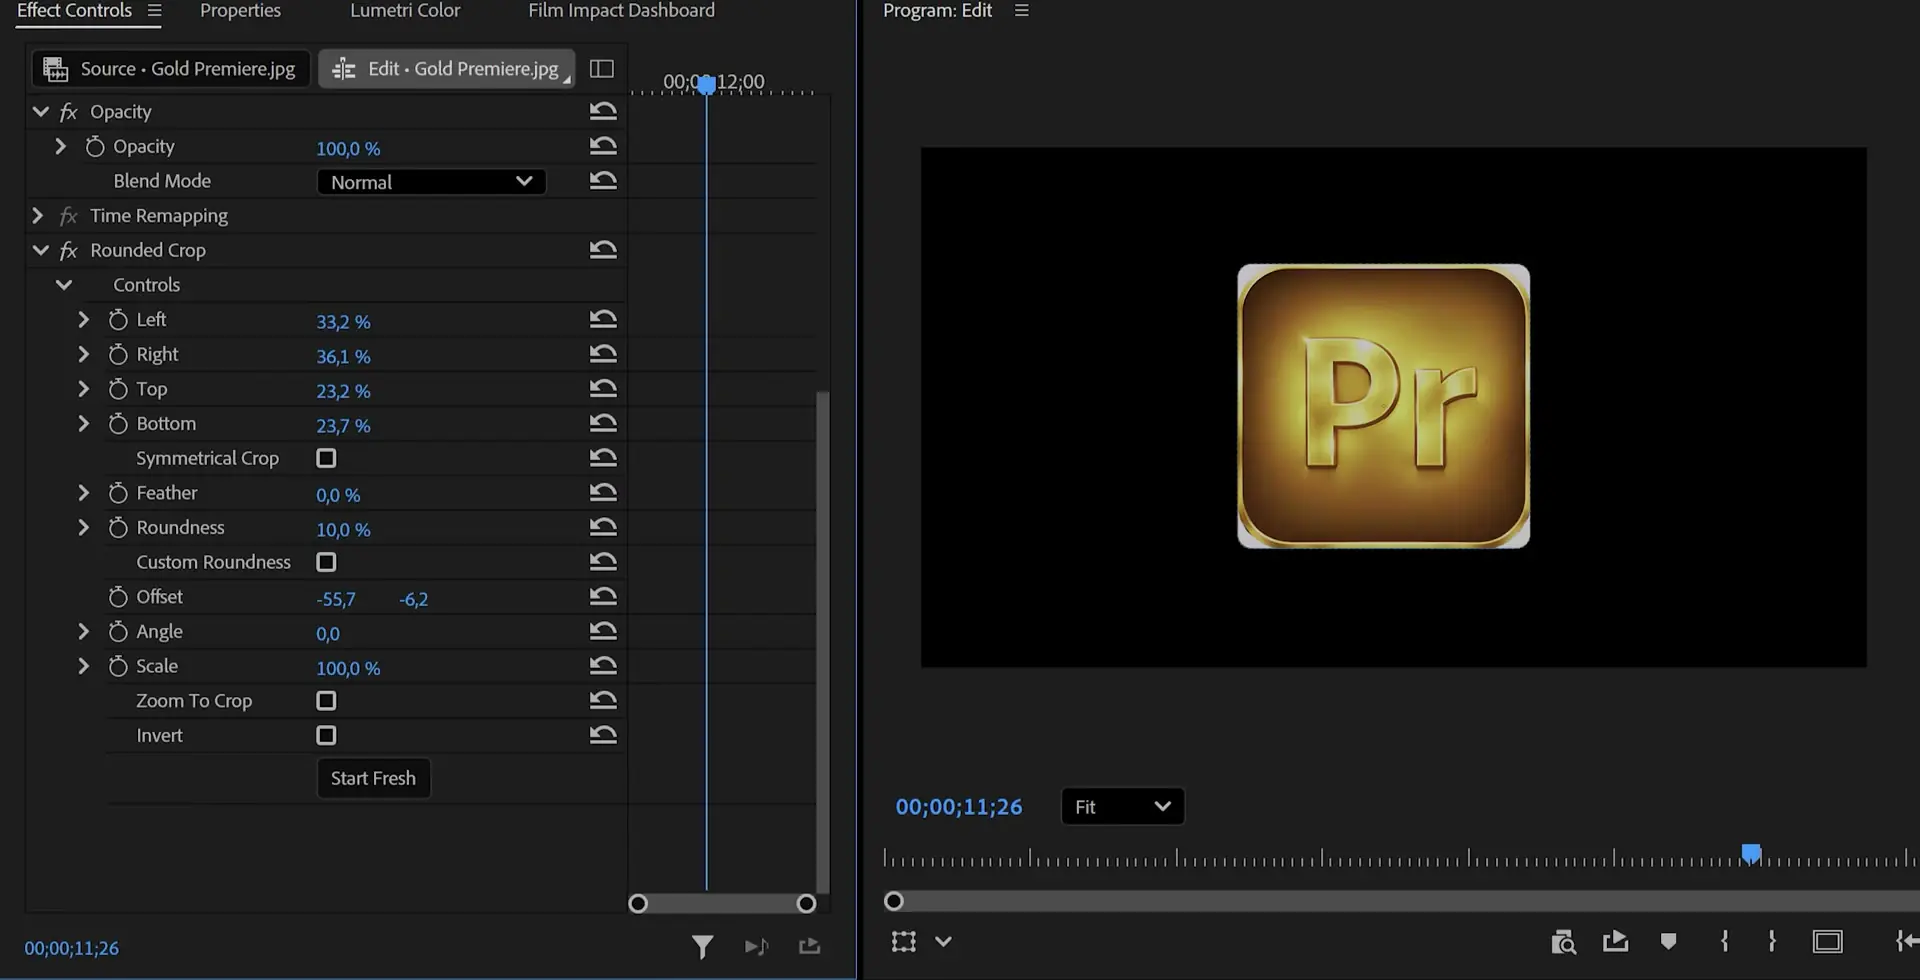
That's when Rounded Crop saves you. It works for anything square or rectangular with rounded corners, like app icons and badges. Drag it onto the clip, then in Effect Controls adjust Left, Right, Top and Bottom until only the icon is left.
Finish by raising Roundness until the corners match the icon. On the gold Premiere logo, 10% was enough. Rounded Crop is a Film Impact effect too, so it's already on your system.
Step 2: add god rays to your logo with Film Impact
Now the logo comes to life. Go to Window > Extensions > Film Impact Dashboard. It's included with Premiere. Nothing to buy or install. Click Lights & Glows on the left and you'll find all three effects we need in one place.
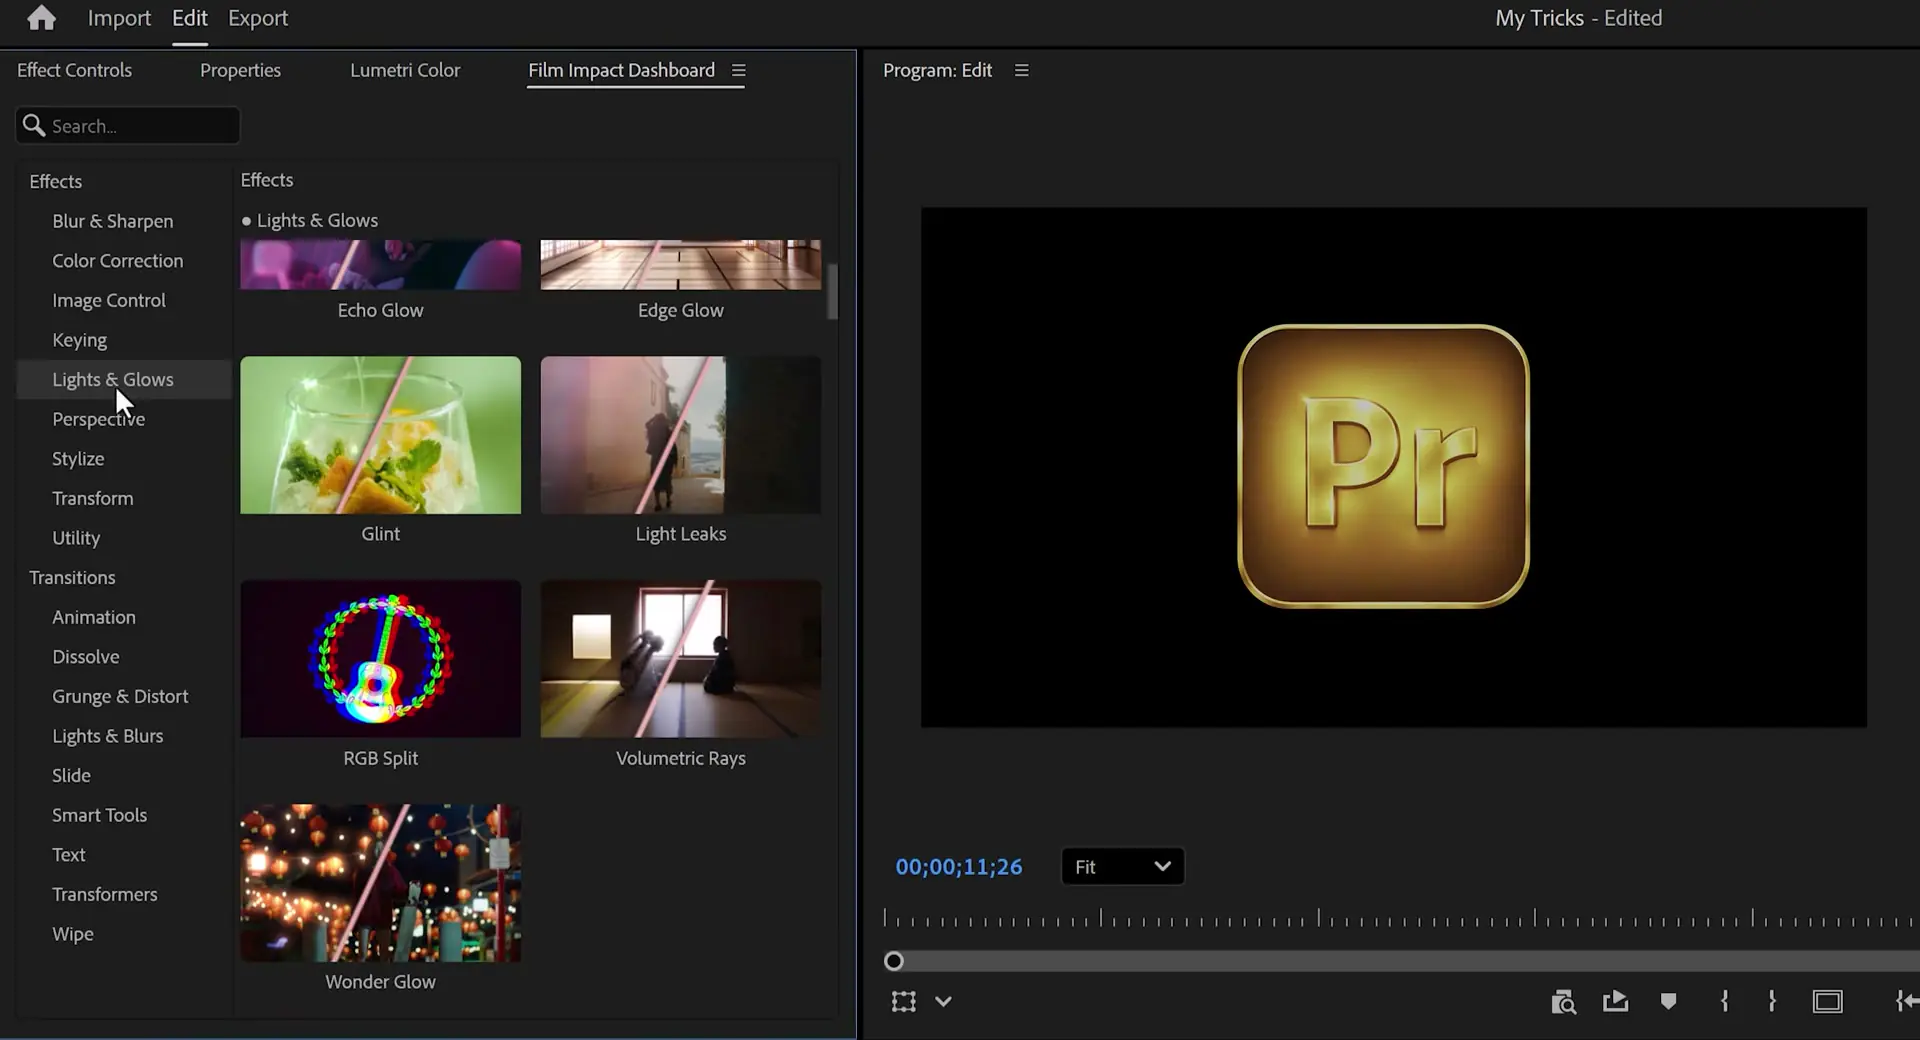
Volumetric Rays for the light beams
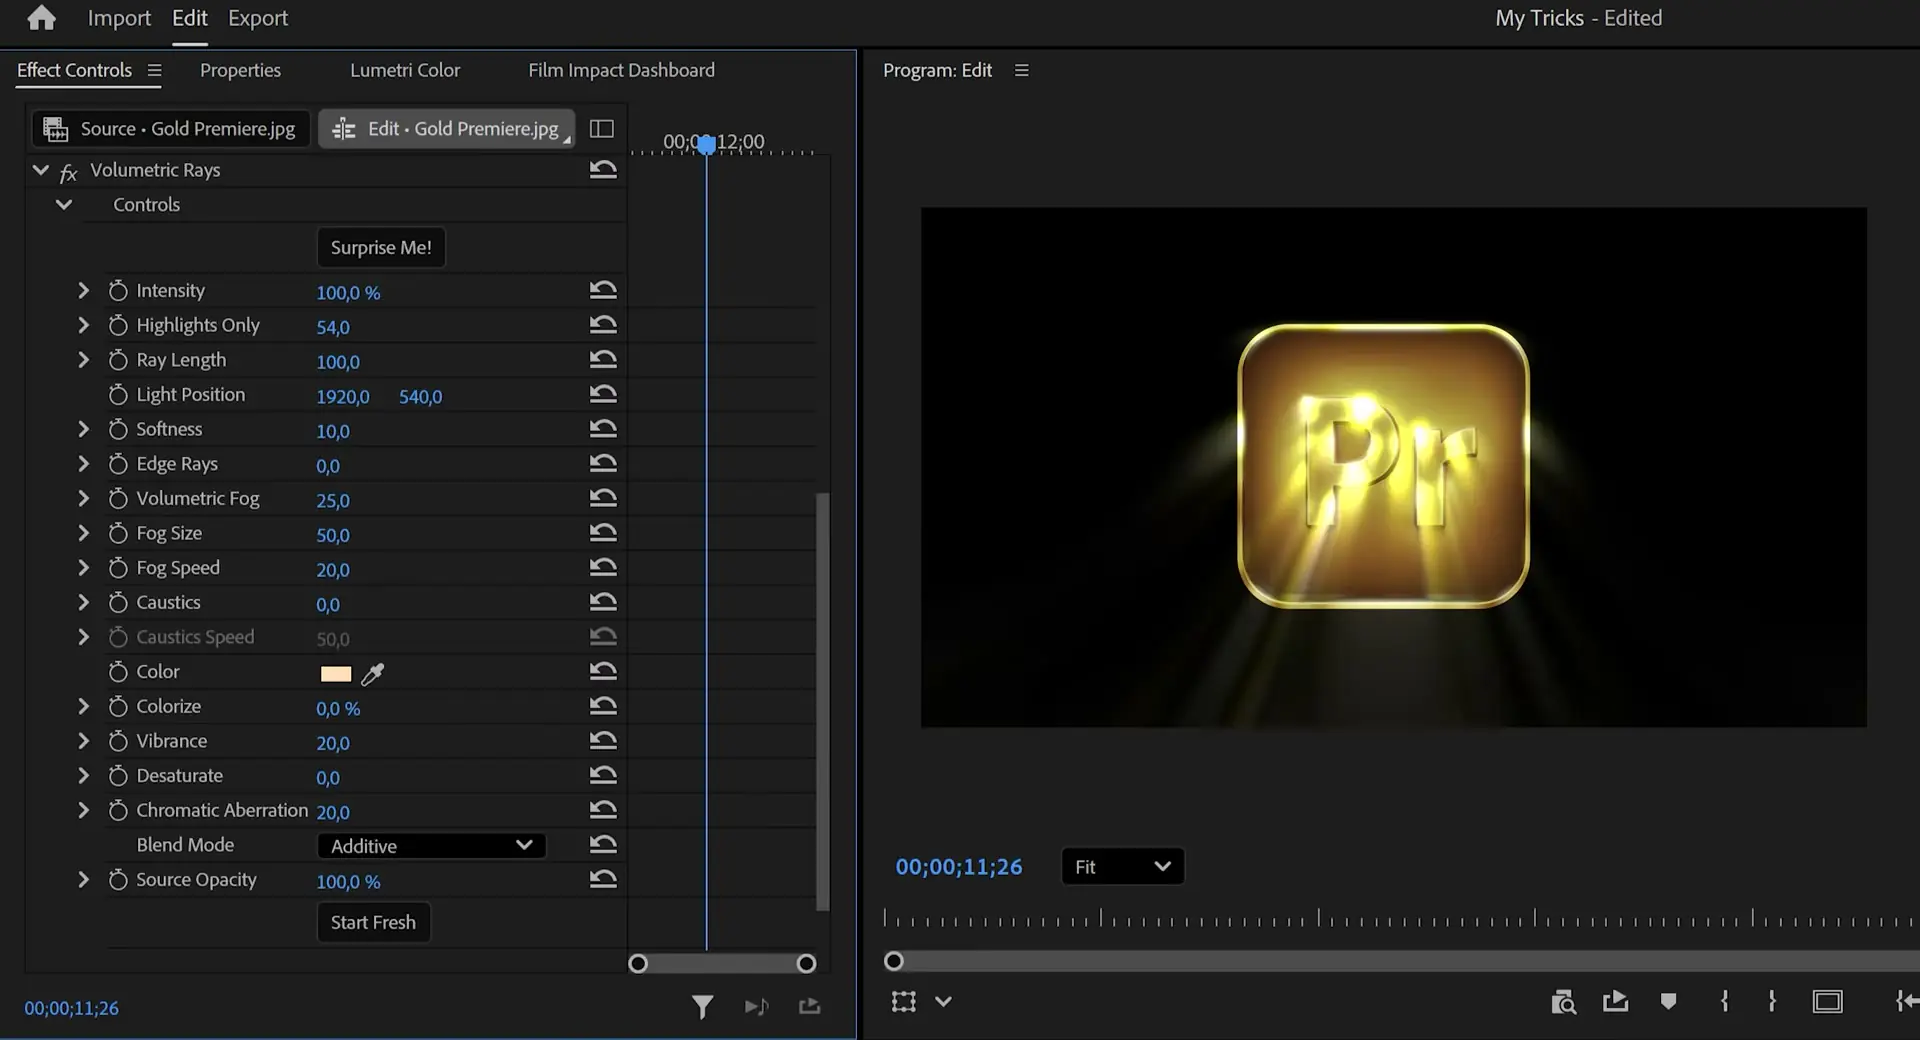
Apply Volumetric Rays first. Don't worry when nothing seems to change. Head over to Effect Controls and play with Intensity, Highlights Only and Ray Length, basically any setting in there, until beams of light start to stream out from behind the logo.
In my version Intensity stays at 100%, Highlights Only sits at 54 and Ray Length at 100, with the Blend Mode on Additive. Those beams are what most people call god rays. If you want them on real footage instead of a logo, I made a separate tutorial on realistic god rays in Premiere Pro.
Glint and Wonder Glow for the shine
Go back to the Film Impact Dashboard and apply Glint. In Effect Controls, adjust its intensity settings until the highlights on the logo start to sparkle. Then return to the dashboard one last time, apply Wonder Glow and tune it the same way.
There's no magic number for these two. The right amount depends on how bright your logo is. My approach is to push each slider way too far, see exactly where the logo starts to look burned out, and then pull it back a bit until it feels right again. With all three effects stacked, a flat gold icon already looks like the opening of a movie trailer.
Step 3: animate the glowing logo with 3D Rotate
A static glow is fine. Movement is better. In the Film Impact Dashboard, open the Transform category and apply 3D Rotate. You can shape the movement in Effect Controls any way you like.
Now play it back. Something looks off: the rays and the glow don't react to the movement. They're pinned to the logo and simply turn along with it, like a flat sticker.
Fix the effect order
The fix takes two seconds. In Effect Controls, click and drag 3D Rotate above the glow effects. In the video I drop it right under Rounded Crop, so it sits above Volumetric Rays, Glint and Wonder Glow.
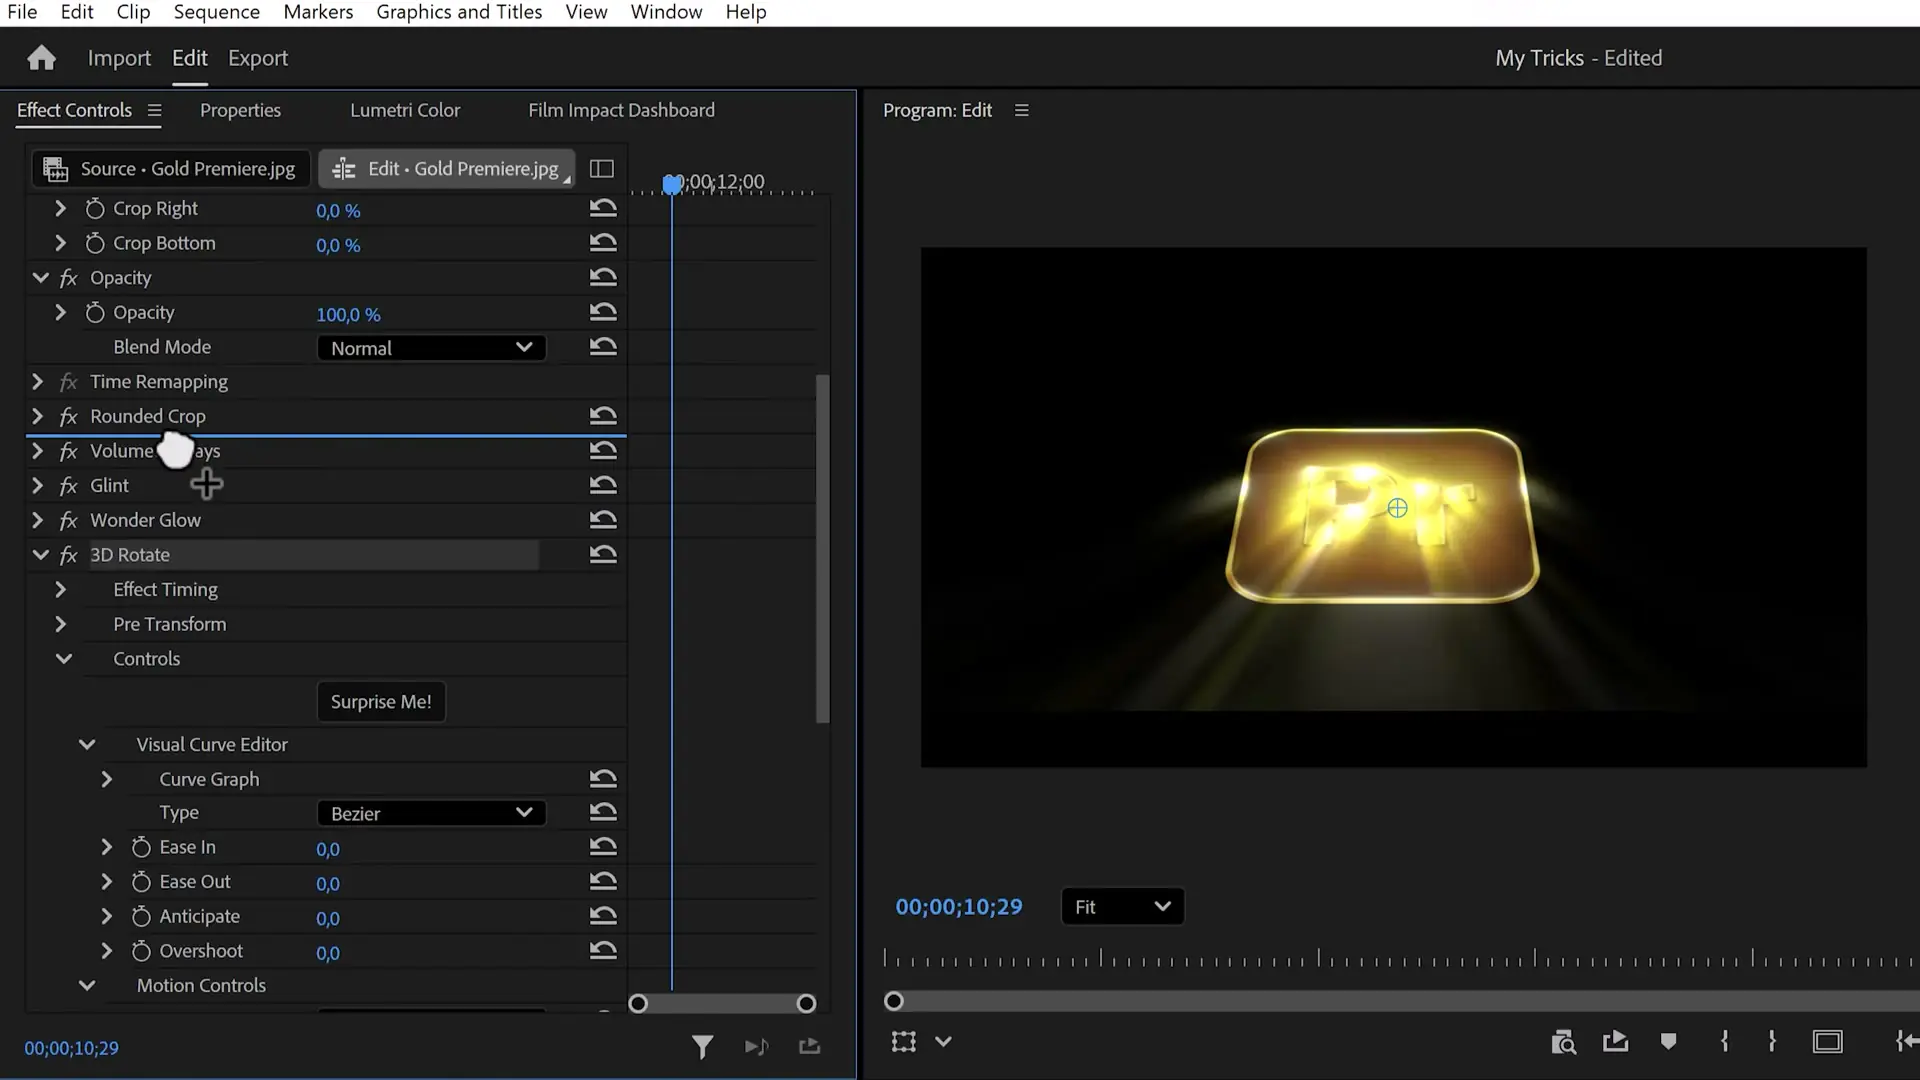
Why does that work? Premiere processes standard effects from the top of the list to the bottom (Adobe's help page on effects explains this). With 3D Rotate on top, the logo turns first and the light is calculated on the moving logo, so the rays sweep across the frame as it rotates. The same rule is worth remembering whenever two effects seem to fight each other.
Two more Premiere tricks from the same video
The glowing logo is the showstopper, but these two save me more time week after week.
Pancake timelines for b-roll and screen recordings
I keep three timelines open in one workspace. At the bottom sits Main Edit, which holds the studio recording of me explaining the tutorial. Above it is Pancake B-roll with all the b-roll I collected, and on top Pancake SC with the screen recording.
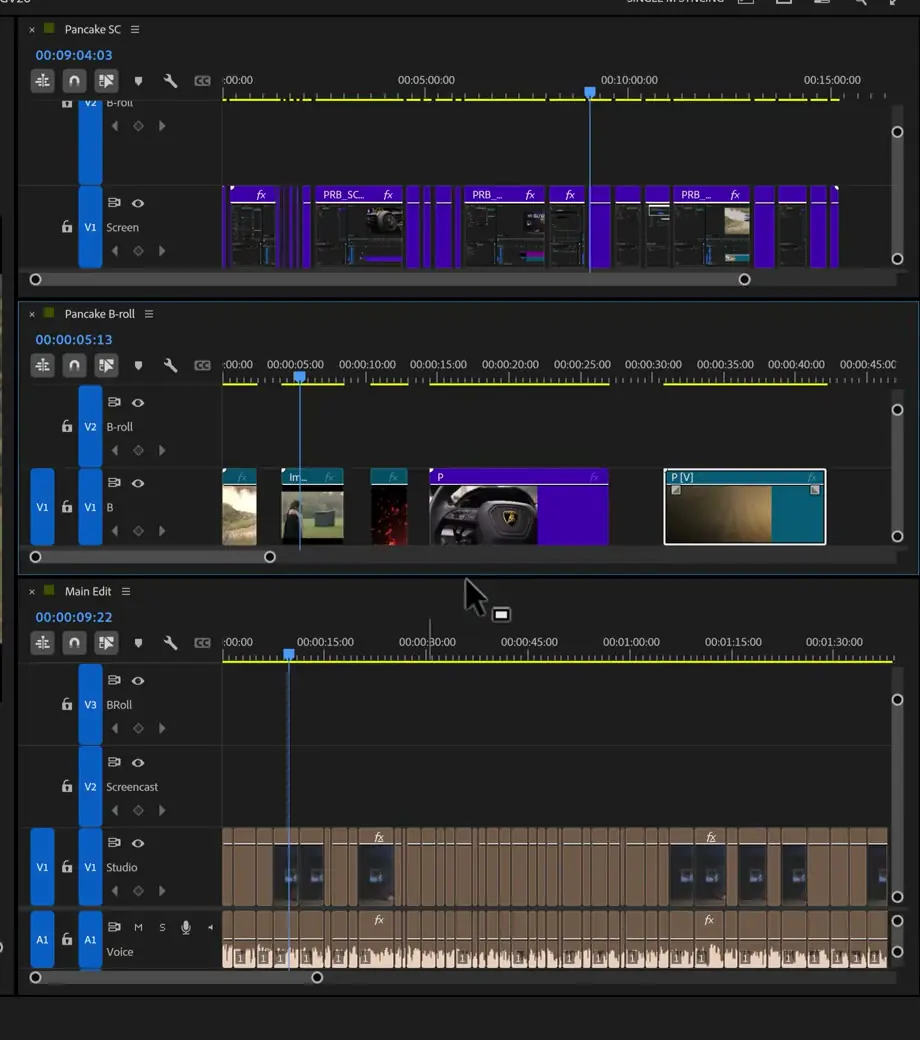
When I need a clip, I drag it from one of the pancake timelines down into Main Edit and line it up with the exact moment in the recording where I'm talking about it. The clips don't disappear from the pancake timeline: they stay there, untouched. So if I mess something up, I can always go back and grab the original again. I wrote more about this way of working in my favorite editing workflow in Premiere Pro.
Build your own motion graphics template
This one is seriously underrated. A motion graphics template (a .mogrt file) is an animation from After Effects that you can edit in Premiere without ever opening After Effects again. Select it in the timeline, open the Properties panel, and you can change the text, the colors and even the floating logos in the background, so one animation works for several channels.
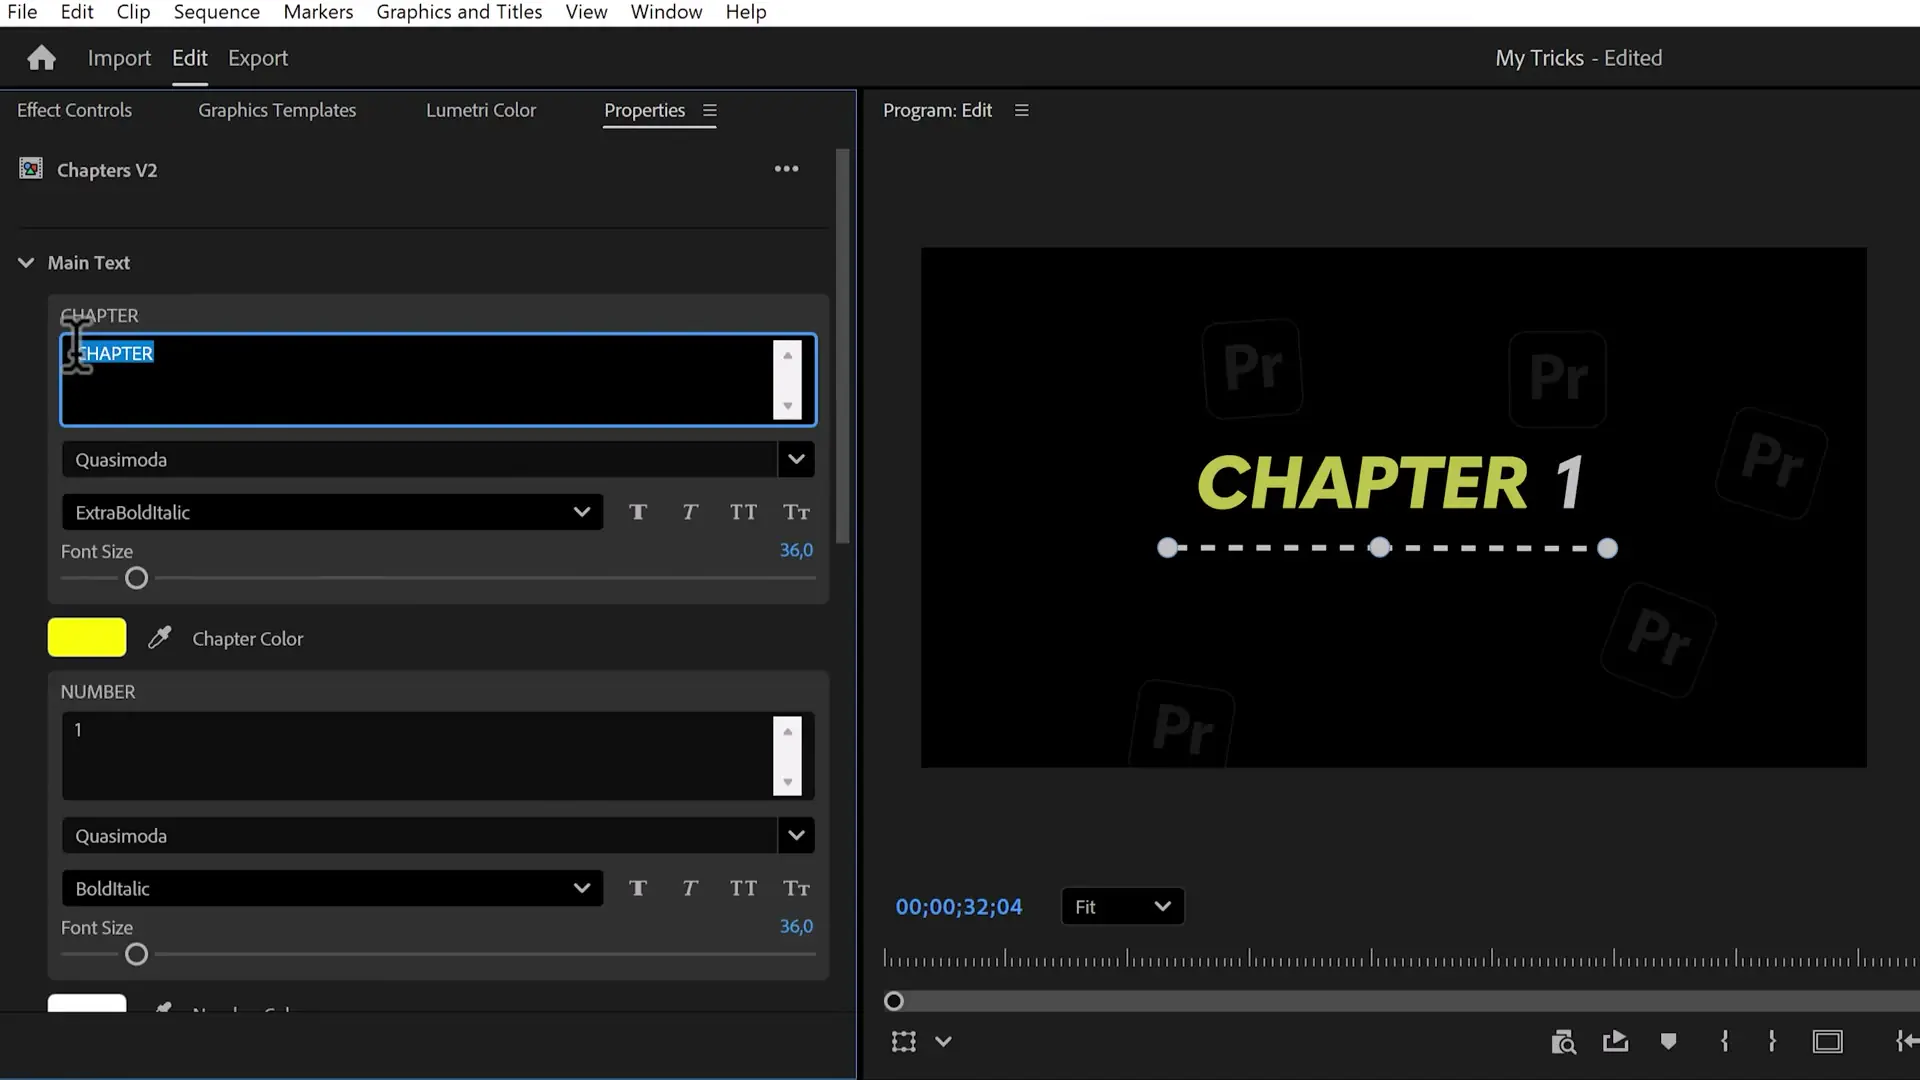
Here's how I build one. In After Effects, I apply the Blinking Cursor Typewriter Console preset to a text layer, which makes any text look like it's being typed. Then I open the Essential Graphics panel, pick my composition and drag the layer's Source Text into it. That makes the text editable in Premiere. You can do the same with any property, like Position.
For color control, I add the Tint effect to the layer and drag its Map White To property into Essential Graphics as well. Rename it to "Color" so it's easy to find. When everything is in place, click Export Motion Graphics Template and save the file.
Back in Premiere, open the Graphics Templates panel, use the button to open a template and import your .mogrt. Drag it into the timeline and it plays back right away. For a longer walkthrough, see my guide to custom templates for Premiere Pro. If you'd rather start from finished animations, my Video Creator Template Pack for Premiere Pro is full of editable titles.
Try it on your next intro
Grab your own logo and build the glowing logo in Premiere Pro tonight: cut it out, stack the three Film Impact effects, add 3D Rotate and put it on top. Once you understand how the order of your effects changes the result, you'll stop guessing and start stacking effects with a plan on every project you open. If you want that kind of control over your whole edit, my advanced Premiere Pro course is the next step.
Jordy Vandeput
Founder of Cinecom · 2.75M+ subscribers on YouTube
Jordy Vandeput is a Belgian filmmaker who has taught practical filmmaking to millions through Cinecom. He breaks professional techniques down into clear, repeatable steps you can use on your very next project.
Related tutorials
 48K
8:17

4 Premiere Built-In Transitions That Replace Keyframes
Premiere built-in transitions can do the work of a stack of keyframes. I show four builds: a text reveal with Motion Camera, a Spin Motion logo animation, a TV turn on effect with TV Power, and lower thirds made from Fold Motion and Spring Motion.
 25K
6:11

How to Make a Superhero Landing in Premiere Pro
Learn how to make a superhero landing in Premiere Pro without After Effects. Cut yourself out with the Object Mask tool, drop in with the Transform effect, speed up the fall with a speed ramp and hit the ground with an earthquake from the Camera Shake effect.
 32K
4:30

I Tried Editing In The FIRST PREMIERE EVER!
Learn 10 mind-blowing and interesting facts and a little bit of history about Premiere in this Adobe Premiere video!
0 comments